DIY Patriotic Stenciled Pillow Cover
Please welcome another of our new contributors (be sure to stop by their blogs and give them some love!)
Hello! I’m Leslea from A Heart Filled Home, and I’m so excited to share my latest DIY project with you today.
I have always loved decorating for holidays year-round. My mom used to have a cute little shelf in our kitchen, and with each holiday she had sweet little hand-painted wood decor pieces to display on the shelf. A little Christmas tree at Christmas time, a painted egg for Easter, a turkey for Thanksgiving, and so on. For the months of June and July I remember setting her sweet little American Flag on the shelf. It was such a nice little reminder of the upcoming holiday, and it kept my brother and I excited about each new season.
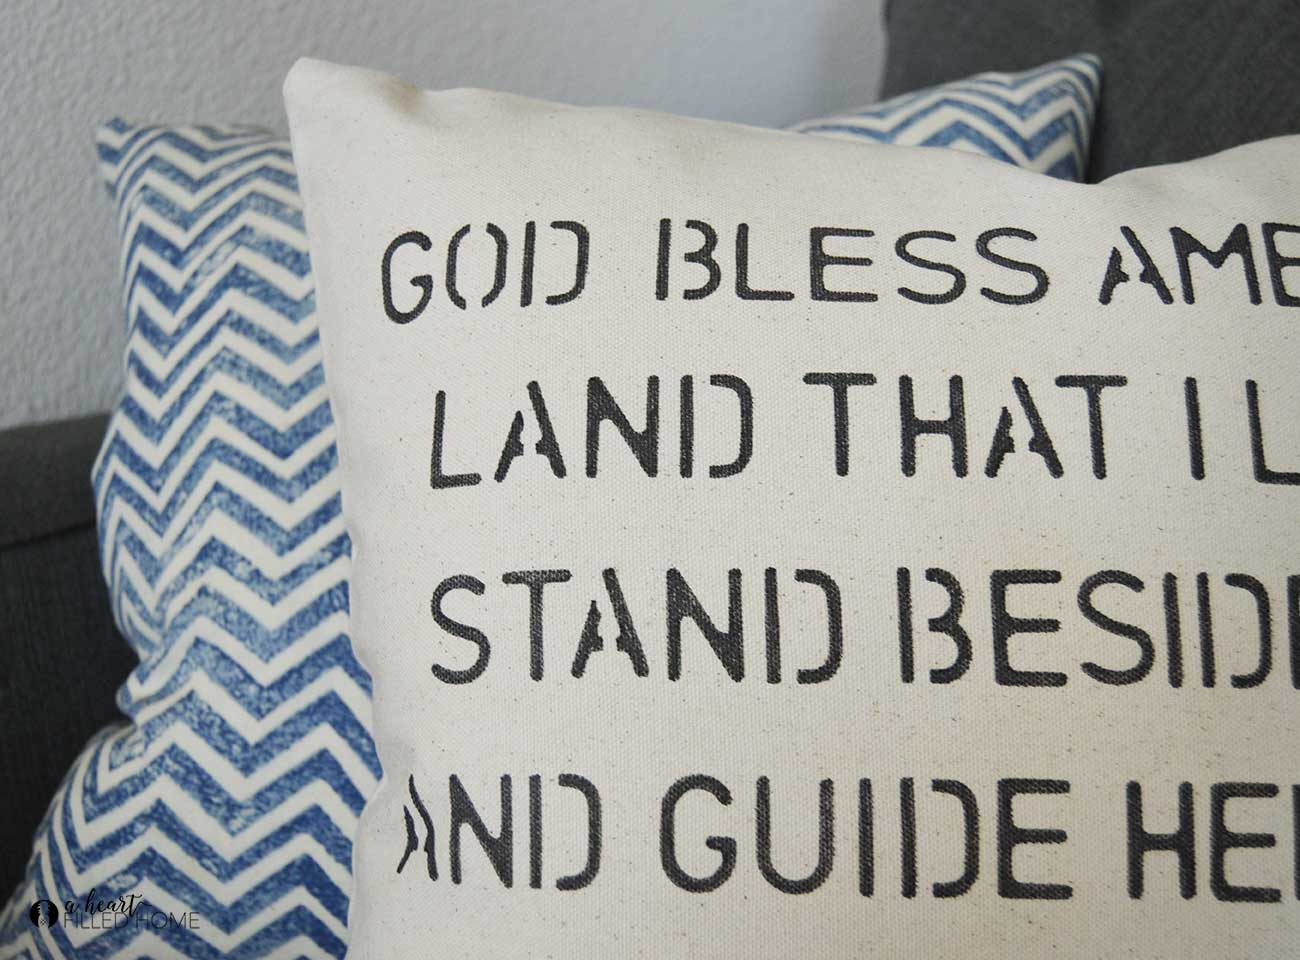
This year I wanted to incorporate some patriotic decor in my own home. I decided to create my own DIY pillow cover using a stencil, a plain pillow cover, and some fabric markers. It is a simple process, and you can customize it however you like! For this DIY patriotic stenciled pillow cover I added some song lyrics from the song “God Bless America” – and I love how it turned out!
DIY Patriotic Stenciled Pillow Cover
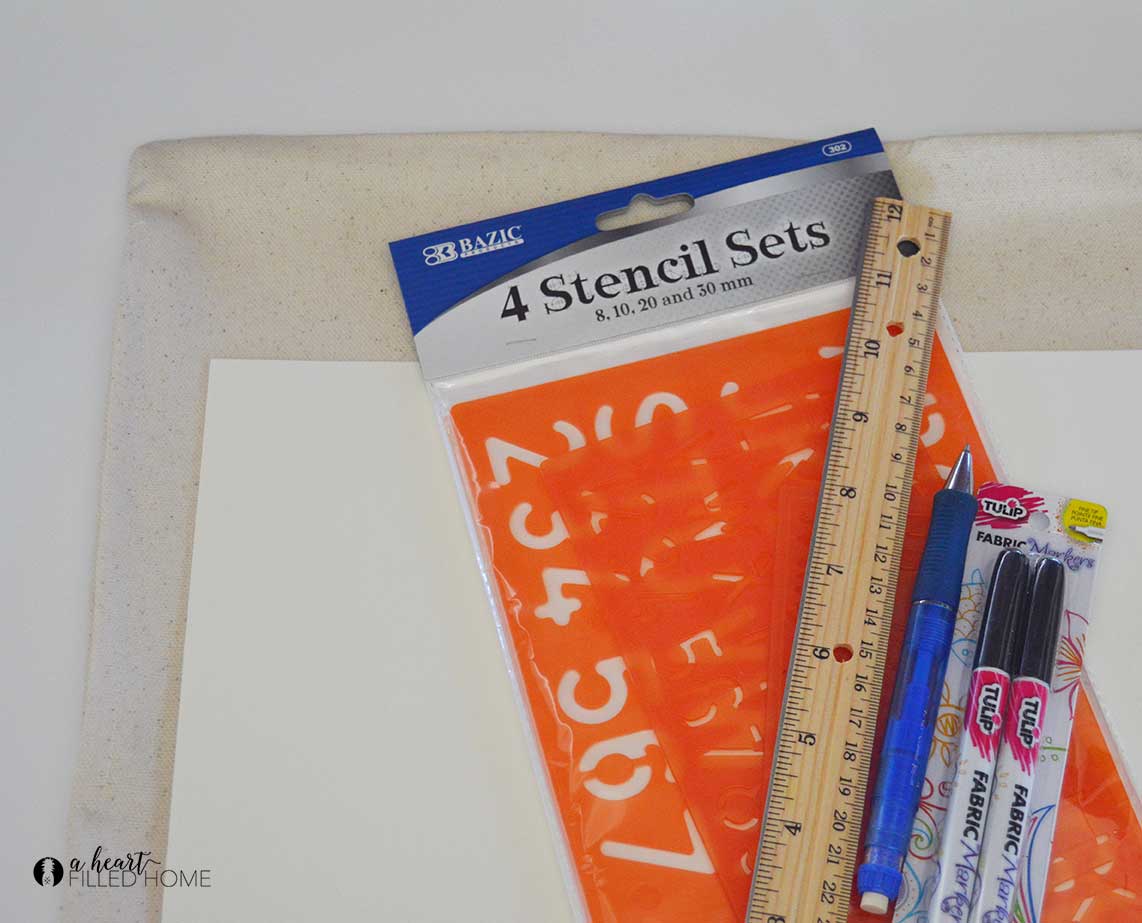
Materials you will need:
- Plain pillow cover (I found mine at Hobby Lobby)
- Fabric marker
- Ruler
- Stencil (I used this one (affiliate link) and it worked great!)
- Pencil
- Paper
- Painter’s tape
- Cardboard
How to make your stenciled pillow cover:
First I ironed my pillow cover to make sure there weren’t any wrinkles to start with. Then I found a piece of paper around the same size as my pillow cover. I sketched out my horizontal lines and used my ruler to make sure that the vertical spacing between each line was the same. I used this paper as my practice sheet where I sketched out some of my words to see how they would fit best on each line.
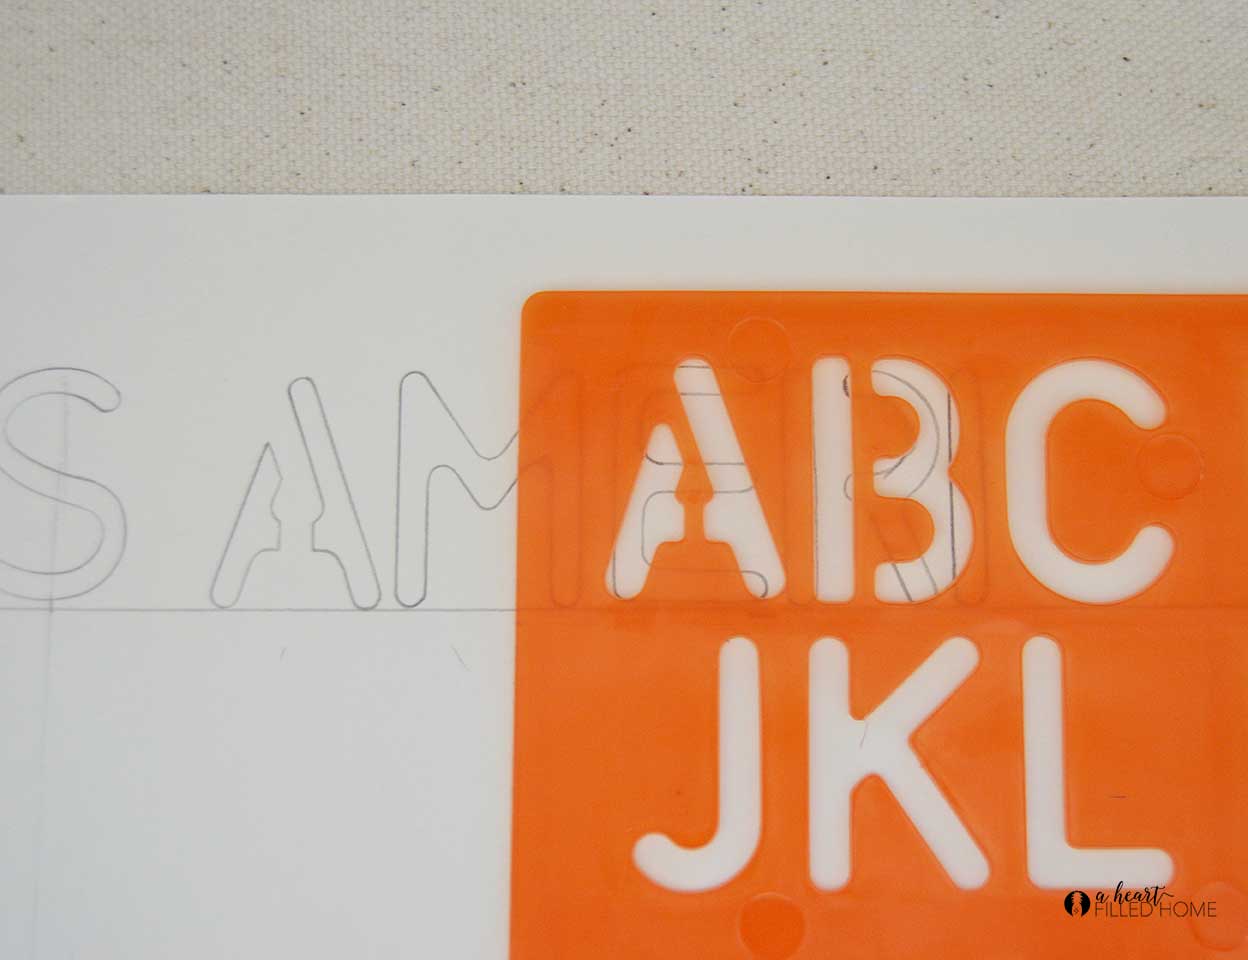
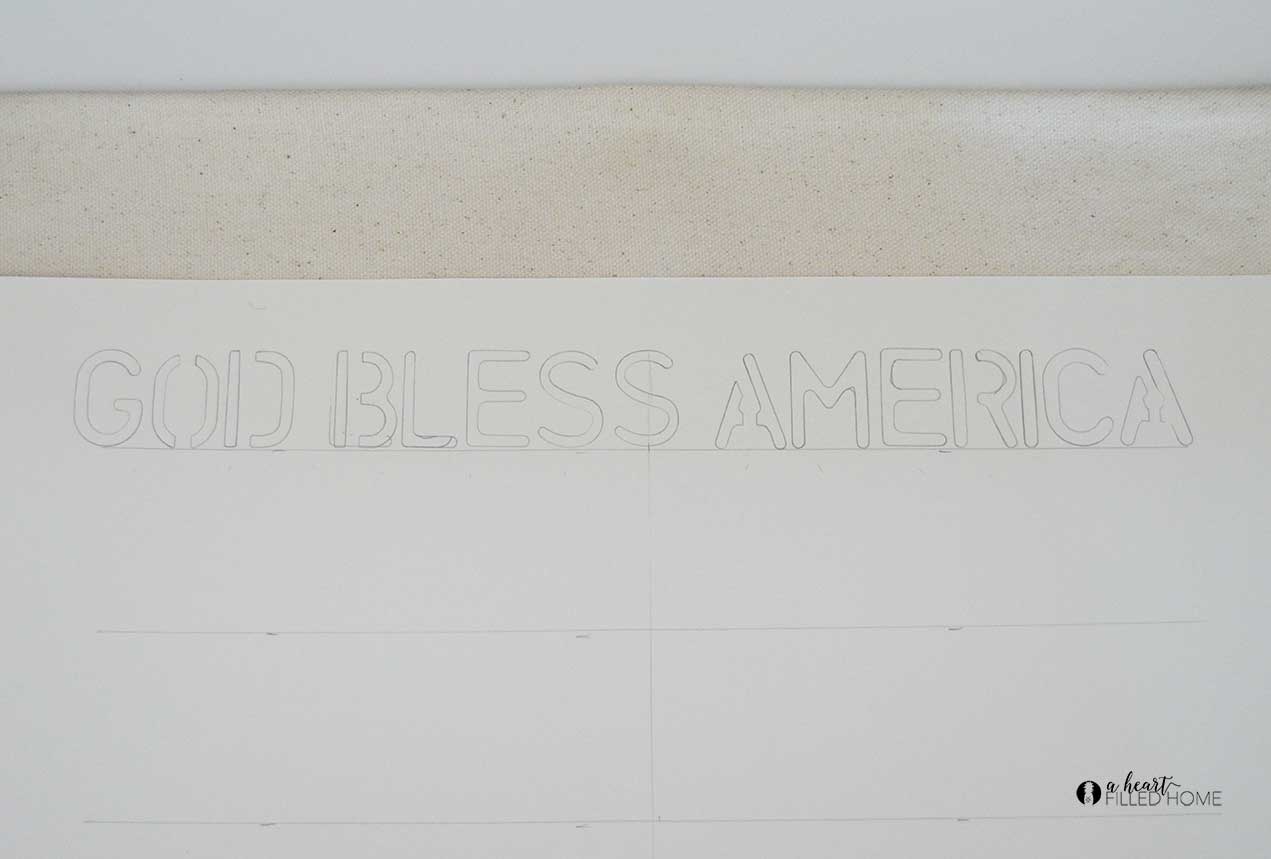
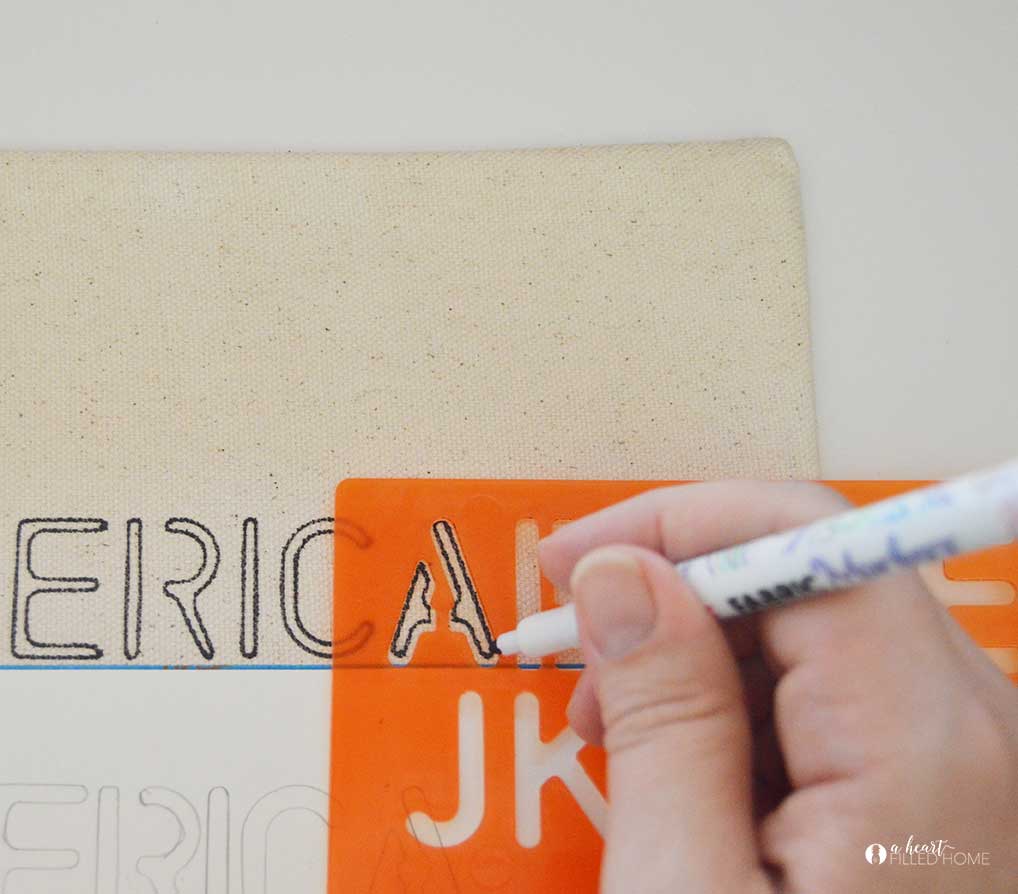
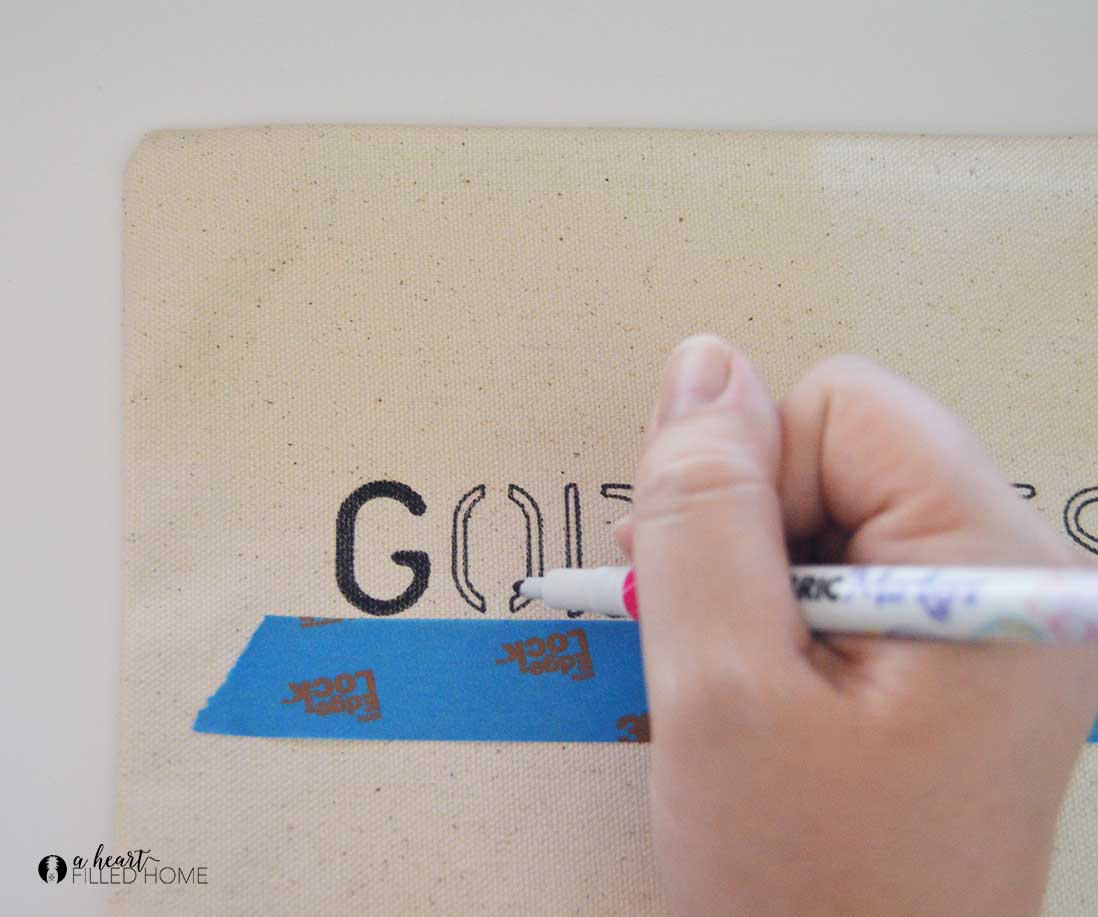
I taped off a line on the pillow with the painter’s tape to give me a horizontal “guide” for my stenciling. I started stenciling in my words with a pencil very lightly, so that if I made a mistake I could erase it. To make sure my letters were straight I made sure the bottom of the letters on the stencil were touching the top line of the painter’s tape. I placed my practice sheet next to the pillow so that I could reference the words and placement.
After I finished tracing the letters with pencil, I went back over it with my fabric marker. I only traced the outline of each letter while using the stencil, then I removed the stencil and filled in the inside of the letters with the marker. I found it easier to fill them in without having to work within the space of the stencil. Afterwards I erased any pencil markings that were visible.
TIP: I placed some cardboard inside the pillow cover to protect the back of the pillow cover fabric, to absorb any marker in case some decided to bleed through. I didn’t end up having any marker bleed through the fabric, but I liked having that safety net of the cardboard – just in case!
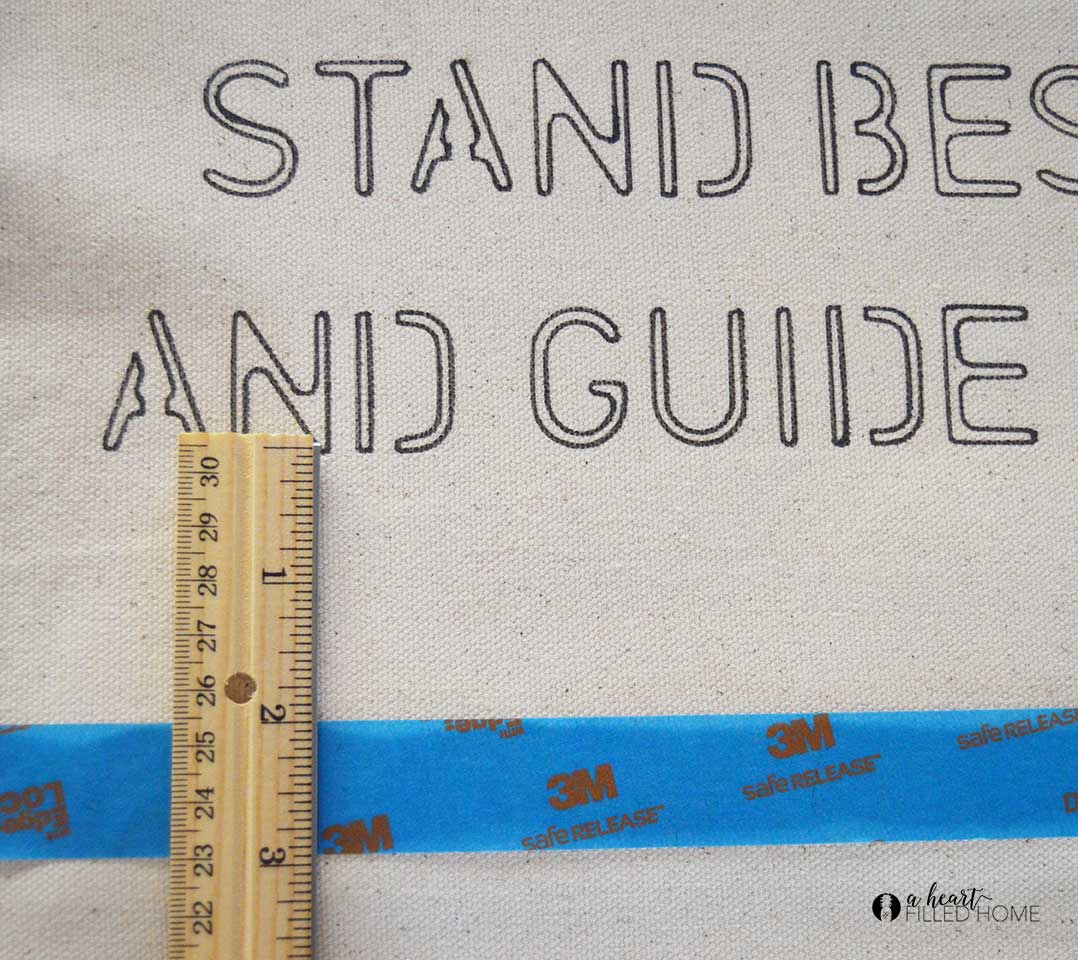
After I was done with each line of text I would measure 2 inches down with my ruler, and move the painter’s tape down to that 2 inch mark. I’d make sure that the left side, middle, and right side of the painter’s tape was 2 inches lower so that the line would be even all the way across.
After filling in all of my letters and letting it dry for 24 hours, I was ready to display it proudly!
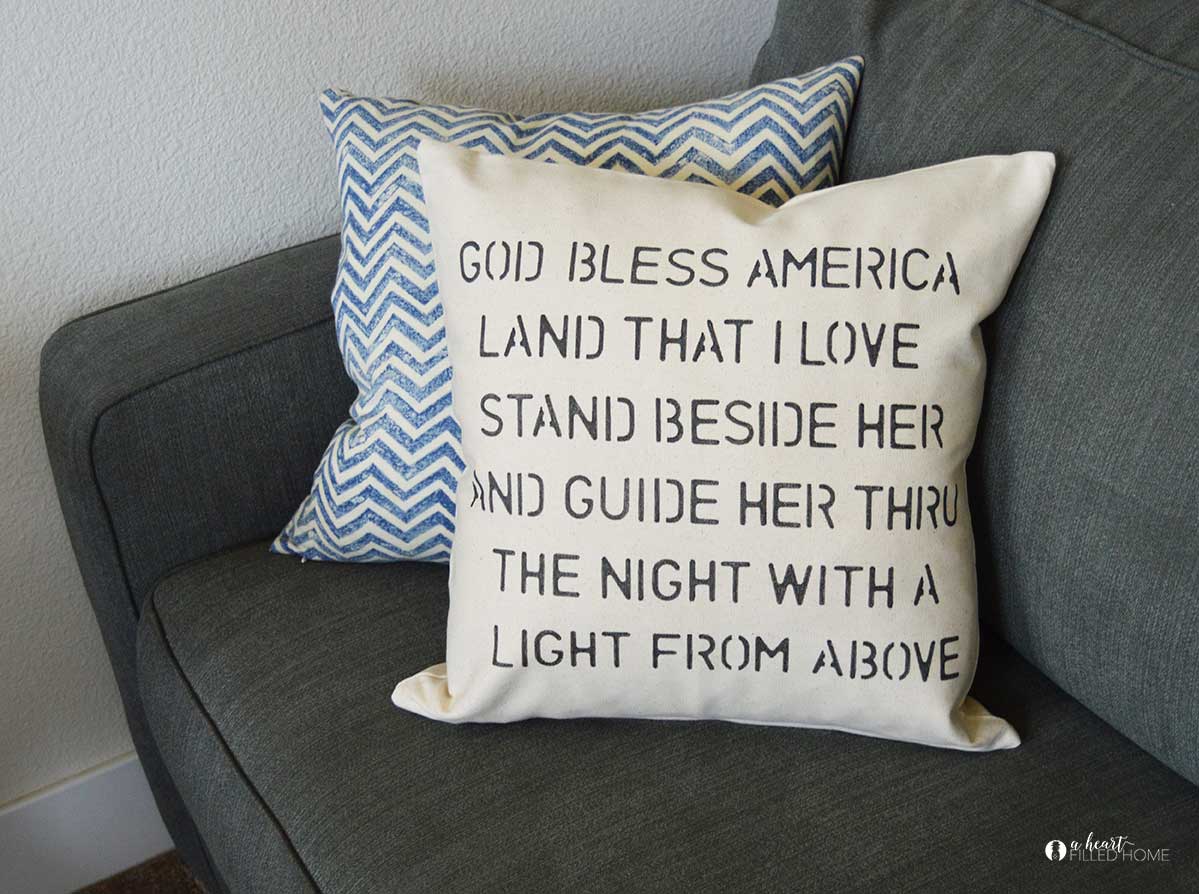
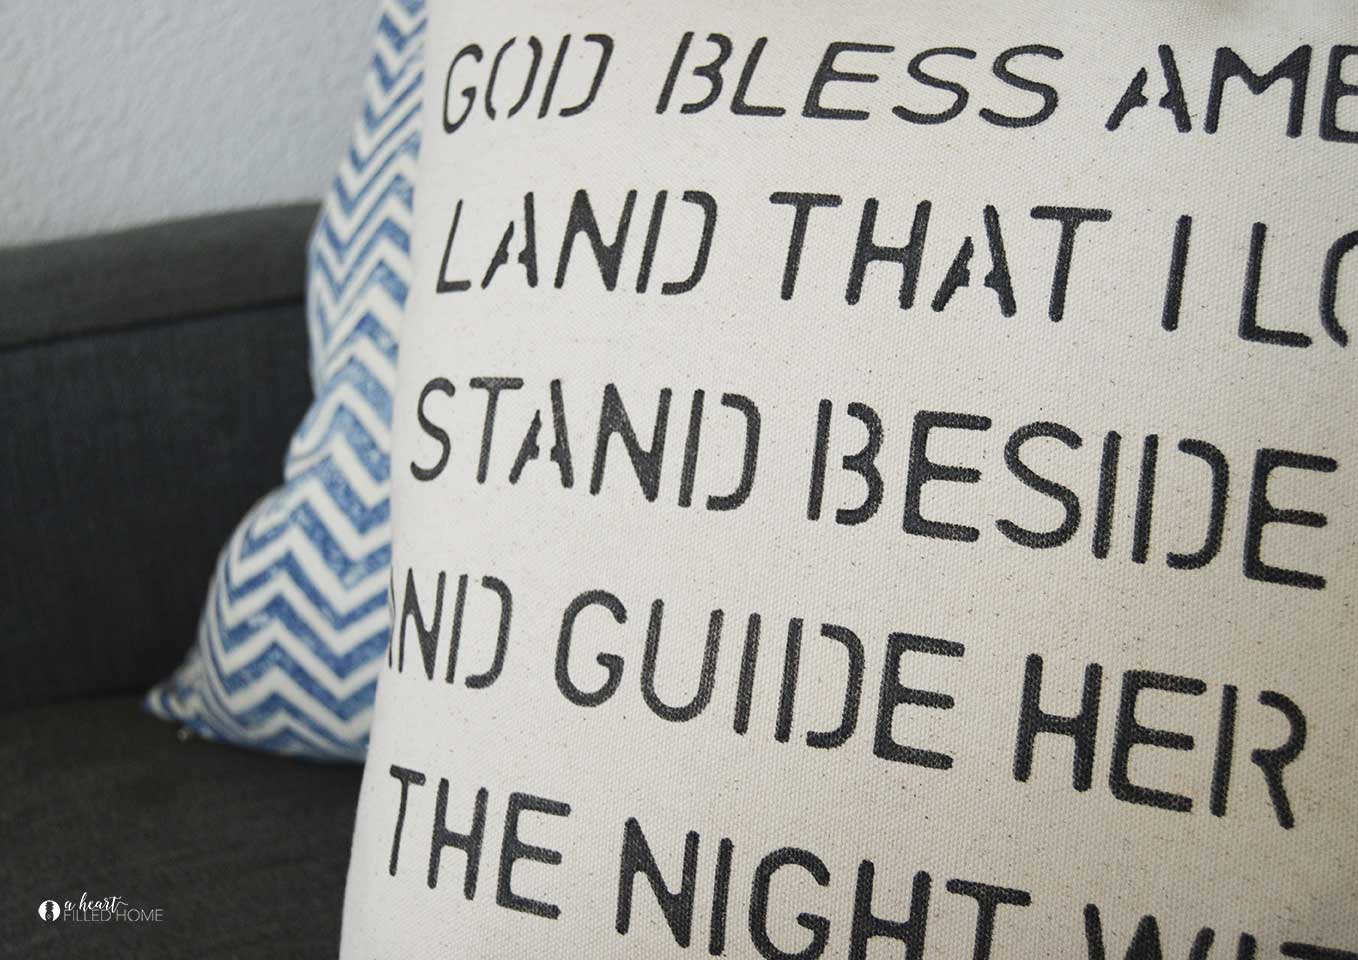
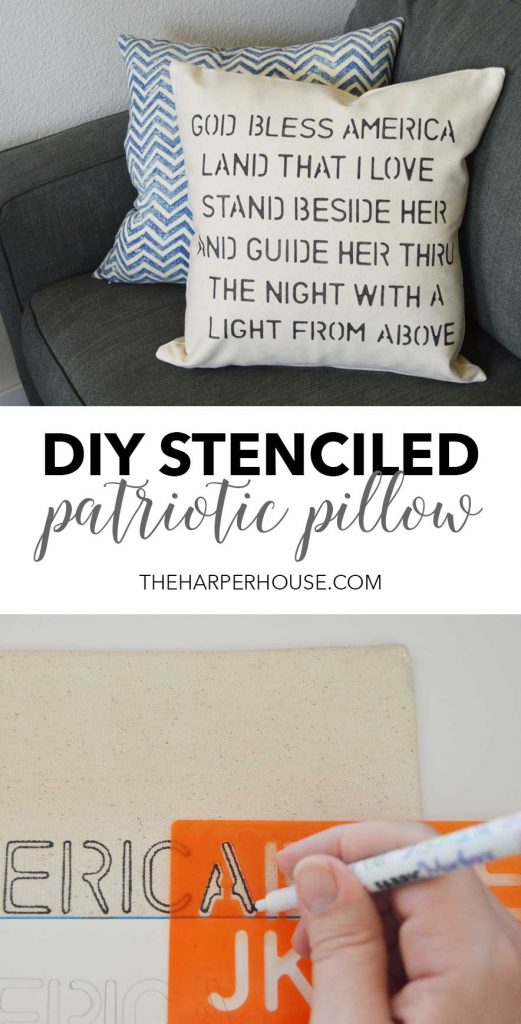
It fits in nicely with my modern farmhouse decor – I love how it looks in our playroom! I’m going to be excited to get this piece out every summer!
I hope you enjoyed this DIY project! If you love DIY, you should take a look at my post on How To Make An Easy Hand-Lettered Canvas 🙂
Blessings,
Leslea


One Comment