Kitchen Island Trim and Lights
One of the ways you can add detail to an otherwise builder-grade kitchen is by installing custom kitchen island trim. Since this is our somewhat-forever-home (at least for the next 10 years or so) I budgeted for specific items that I really really wanted and chose to save money on other things that weren’t super important to me. But thankfully since Craig is such an awesome carpenter, we’re usually able to get a similar custom look diy-style! So instead of ordering fancy end panels for the island from the cabinet place (that cost beaucoup $$) I had him build our own custom panels. ** this post may contain affiliate links. see my full disclosure here.
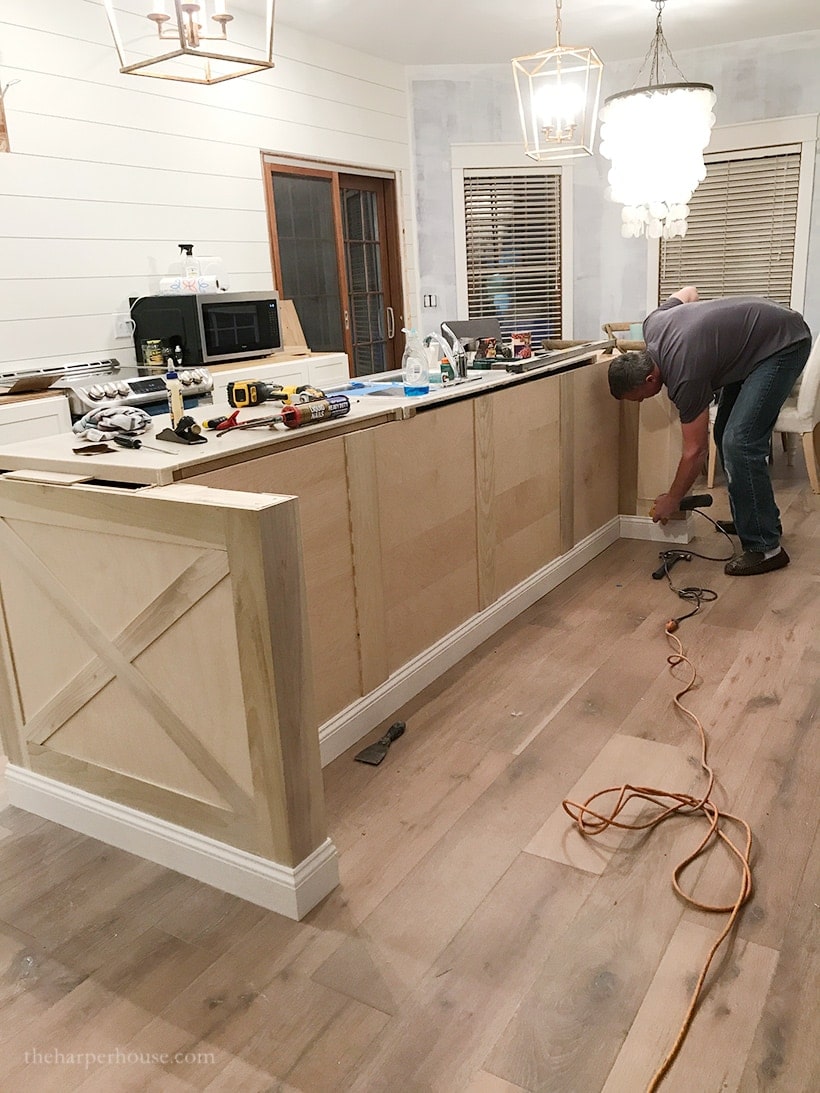
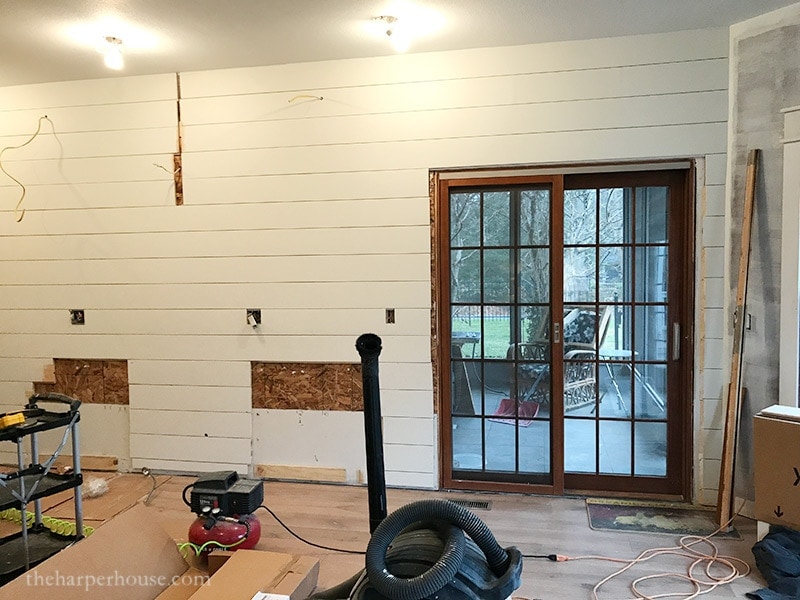
The island is 120″ long with the sink centered in the middle. The cabinets were 24″ deep and of course this isn’t deep enough for an island. So we decided on a finished depth of 40″ for the island. I would have gone even deeper but we needed ample walkway space between the fireplace and island. So here’s what the island looked like prior to Craig adding the kitchen island trim:
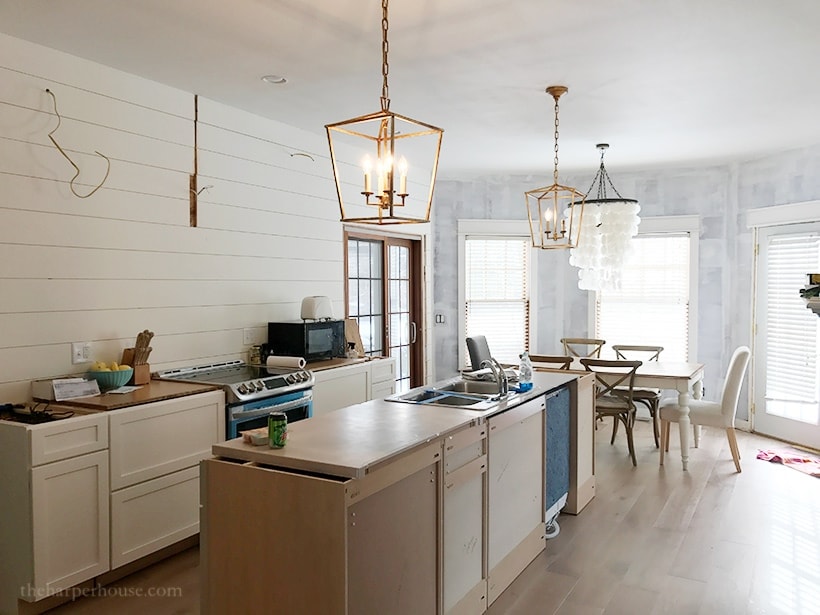
to still have a usable sink during the renovation, Craig put the old countertop back on and hooked up an old stainless sink we had from one of our apartment buildings. Looks pretty redneck, but at least we didn’t have to do dishes in the bathtub! 🙂
Kitchen Island Trim
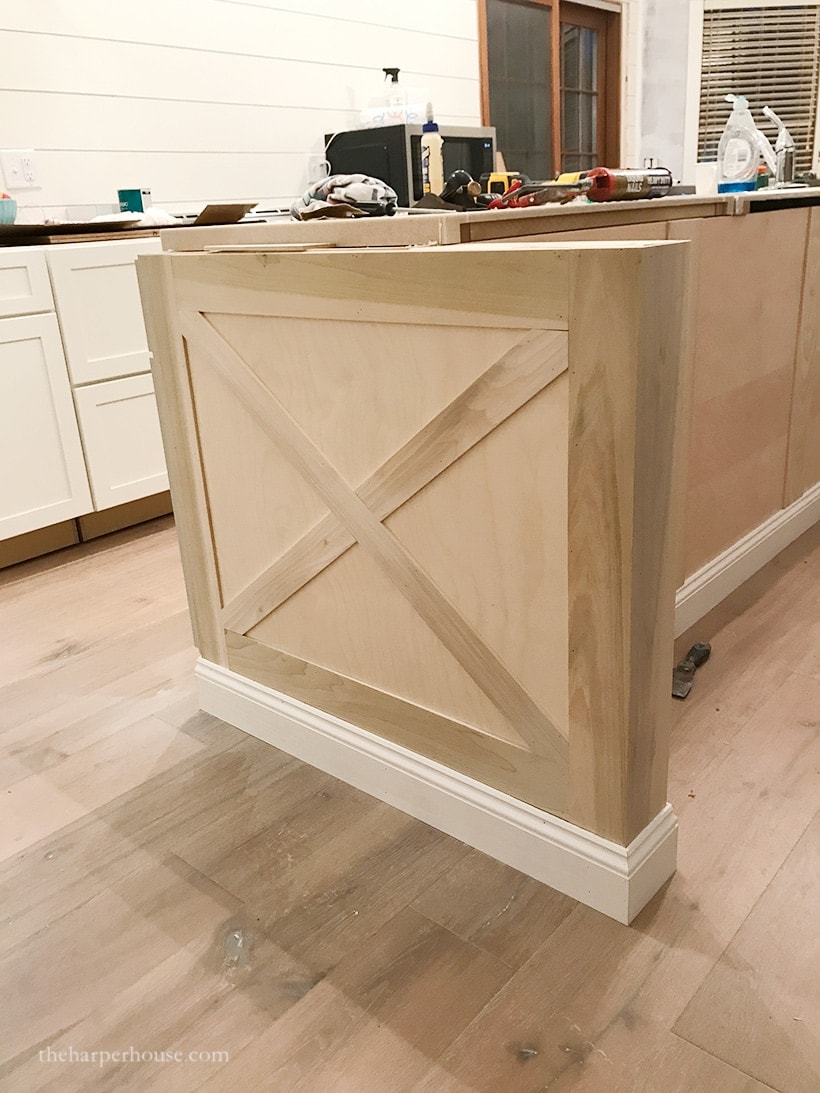
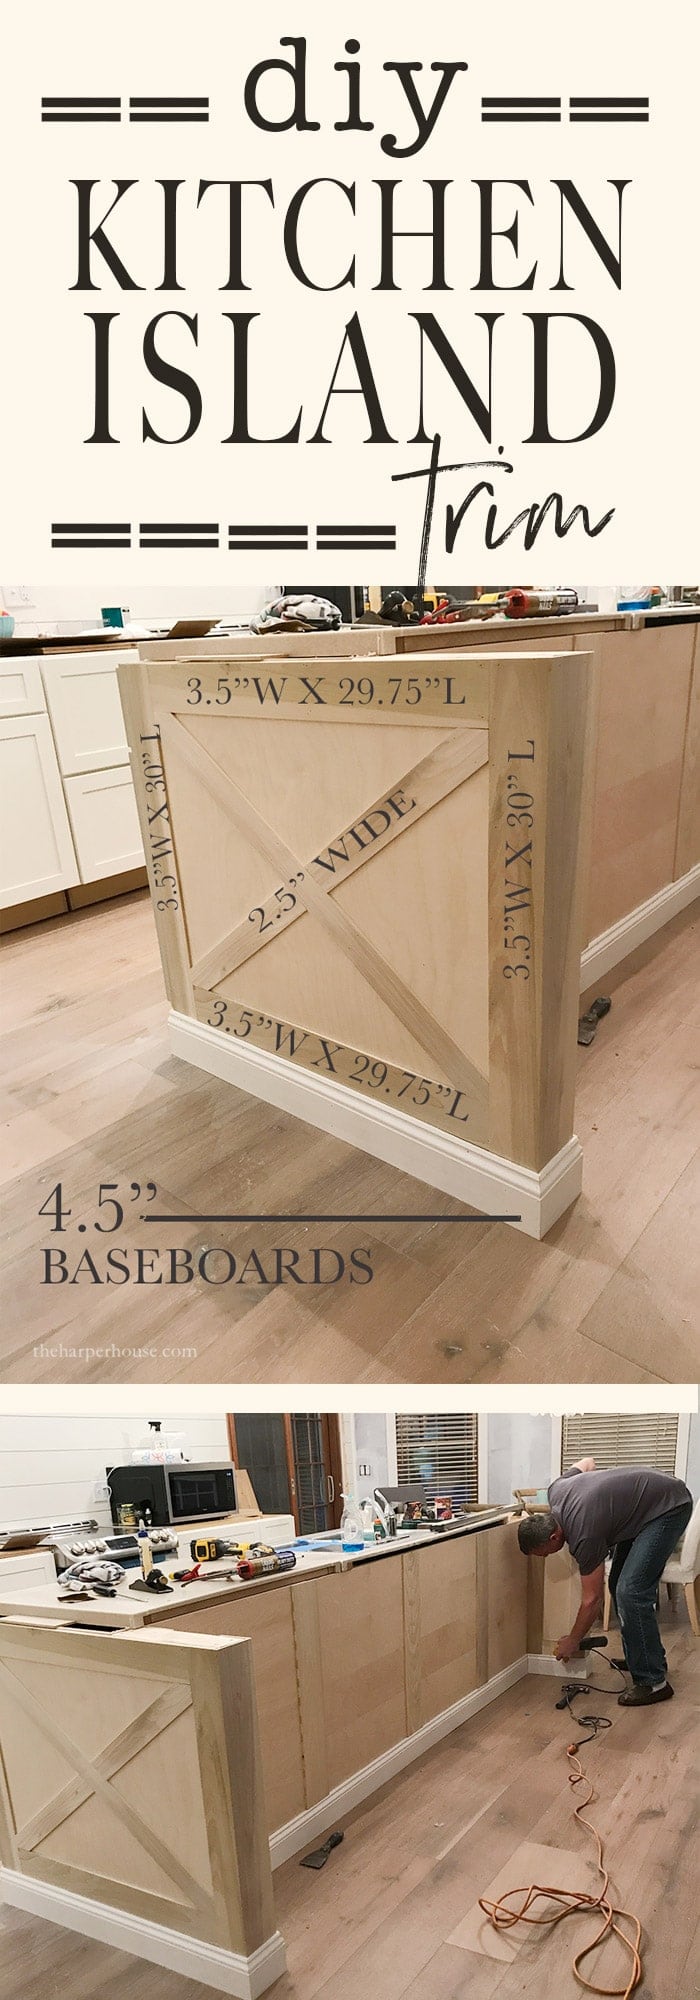
We searched through tons of inspiration pics on Pinterest and Instagram and settled on an x style design for the end panels. I wanted the ends of the island to be beefy and substantial. We added similar x style detail to the ends of the island at Mouse House, but created the panels for this new kitchen to be the full 40″ wide to support the island countertop without the use of corbels.
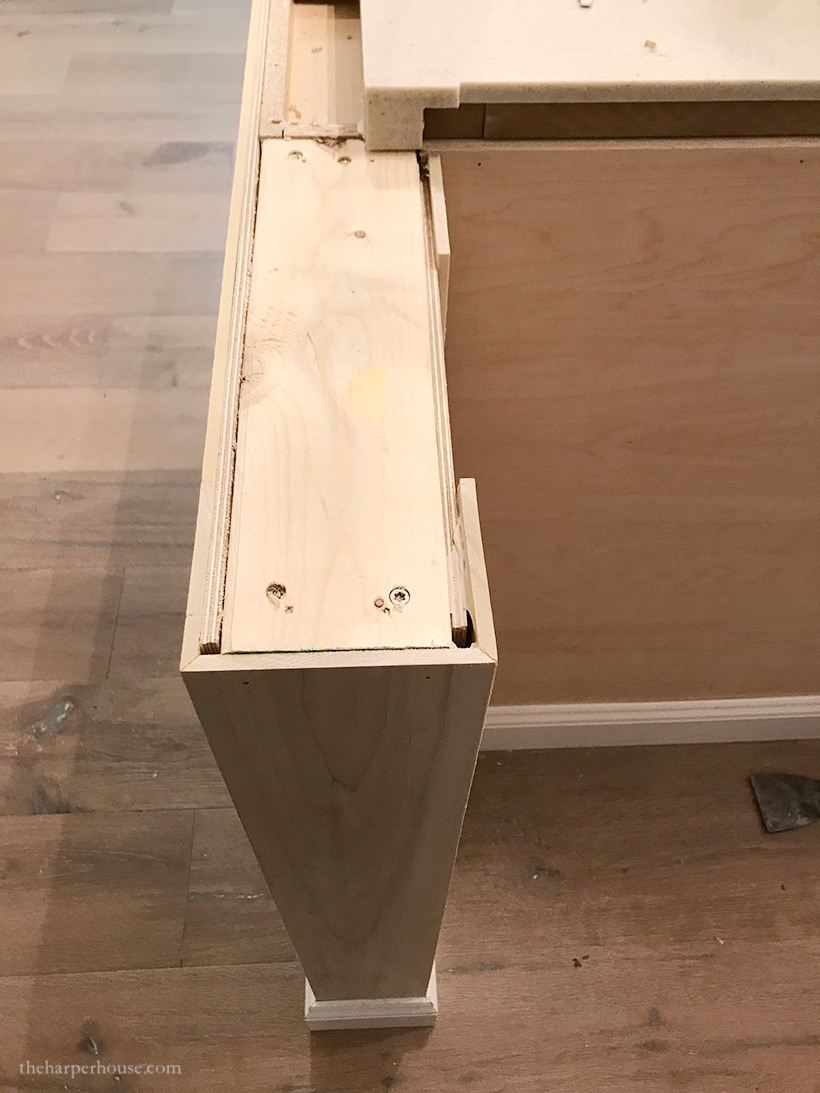
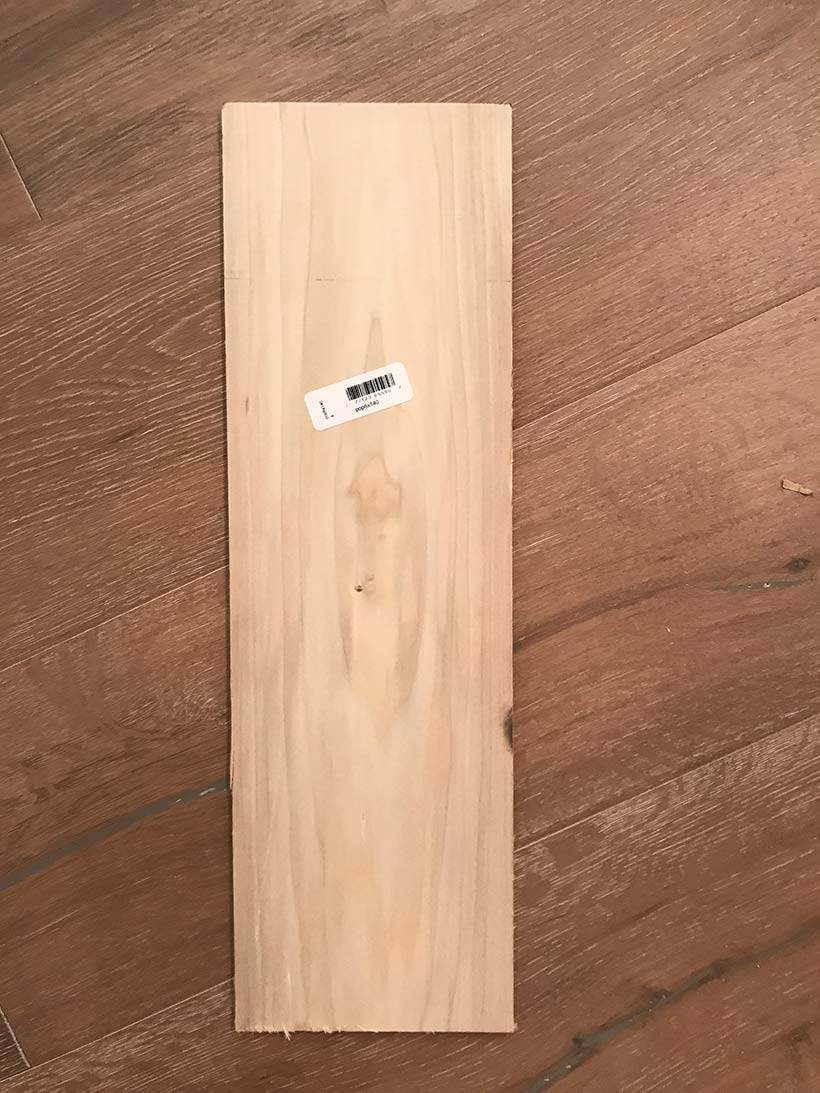
He extended the island depth by building a small wall with 2×4’s and wrapping it in 1/4″ maple plywood. He then used smaller, thin poplar boards from Lowes to create the x design.

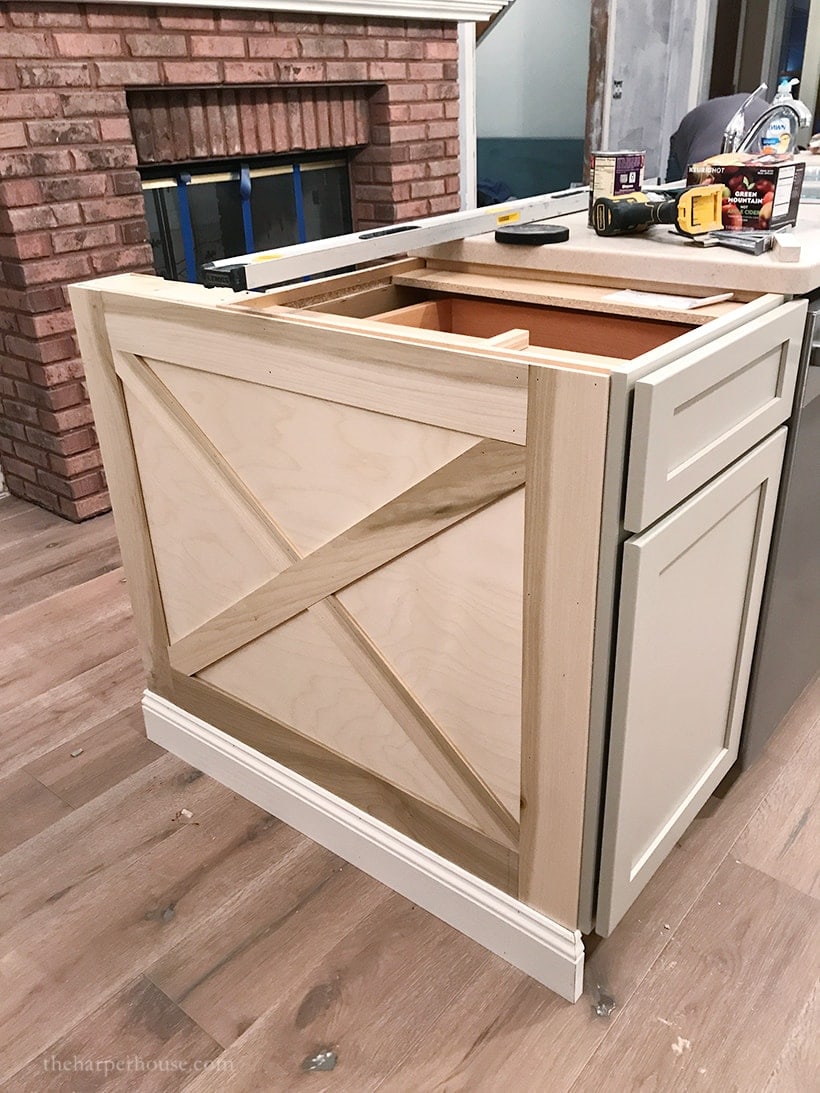
He attached the x board pieces to the plywood with a pin nailer using 23 gauge size nails (and he used his 18 gauge nailer on the corner pieces) He’s got so many tools – at least he’s putting them to good use with all these projects!
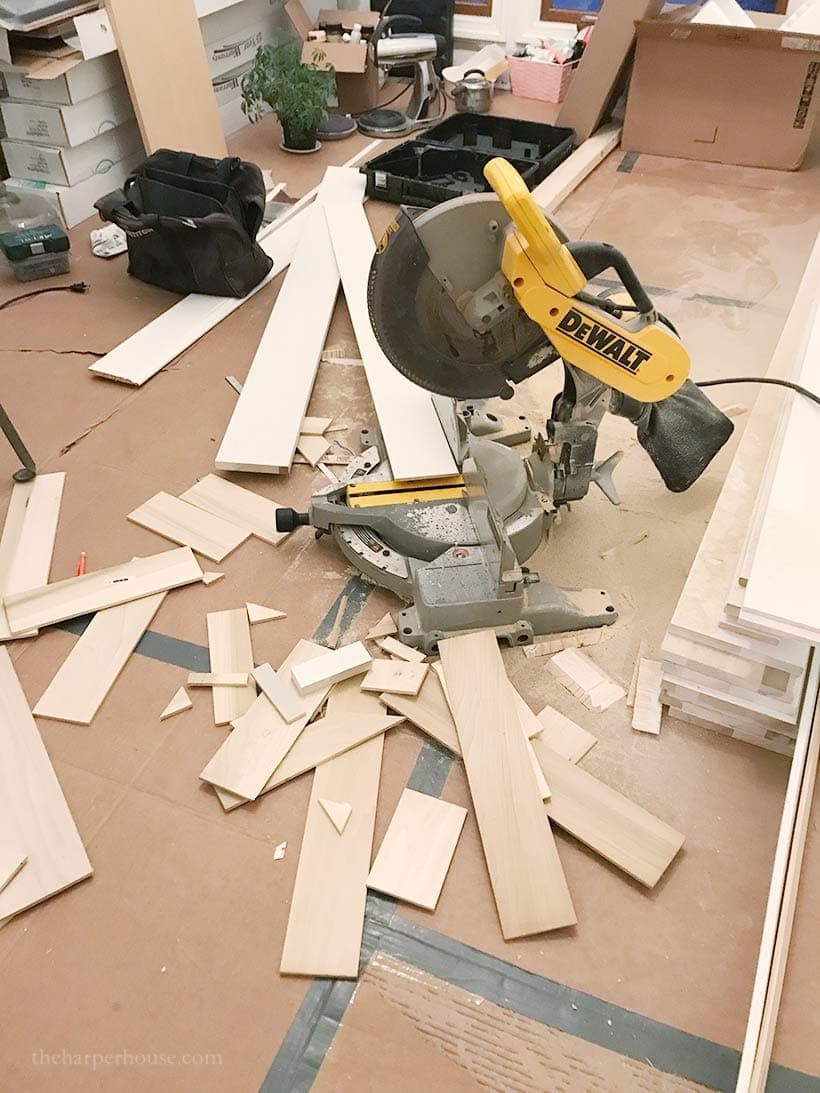
Here’s his makeshift dining room / work shop 🙂 See similar miter saw on Amazon (he uses this thing ALL the time!)
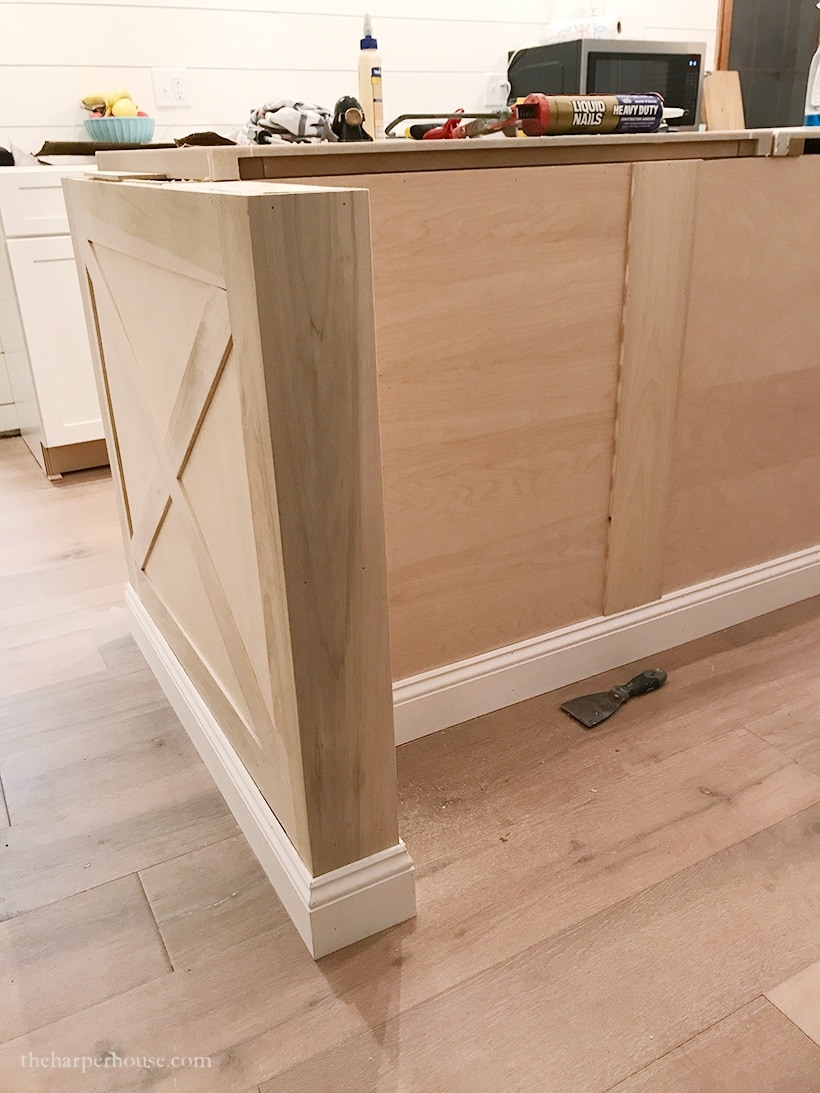
Then for the back of the island, we just decided to attach the thin poplar boards every 24″ to give a little detail (he attached them over the maple plywood.) I will have 3 barstools at the island so the back won’t be very noticeable.
 We decided to add 4.25″ baseboards (similar to these) to the island to give it a finished look. Then fill holes with putty, sand, caulk, and paint (custom color matched to the stock Chai Latte gray/taupe cabinets from Medallion/Menards)
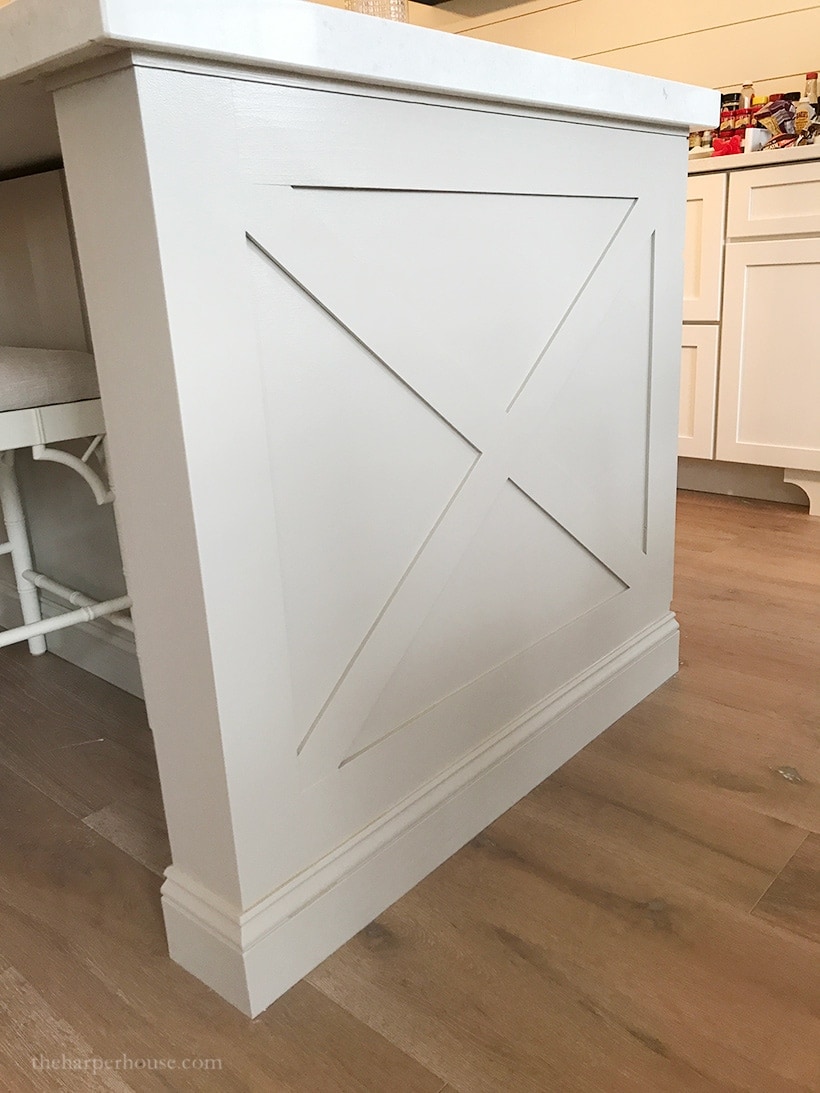
I love how the kitchen island trim turned out! Sneak peek – there’s our new counter top! They were delivered last week and I AM IN LOVE! Thank the Lord, because I was not able to see a full slab prior to ordering but they truly look GORGEOUS. Full post to come on countertops, so stay tuned!
UPDATE:
I had several questions about the finished island – so here is a front pic with our new countertops and farmhouse sink installed:
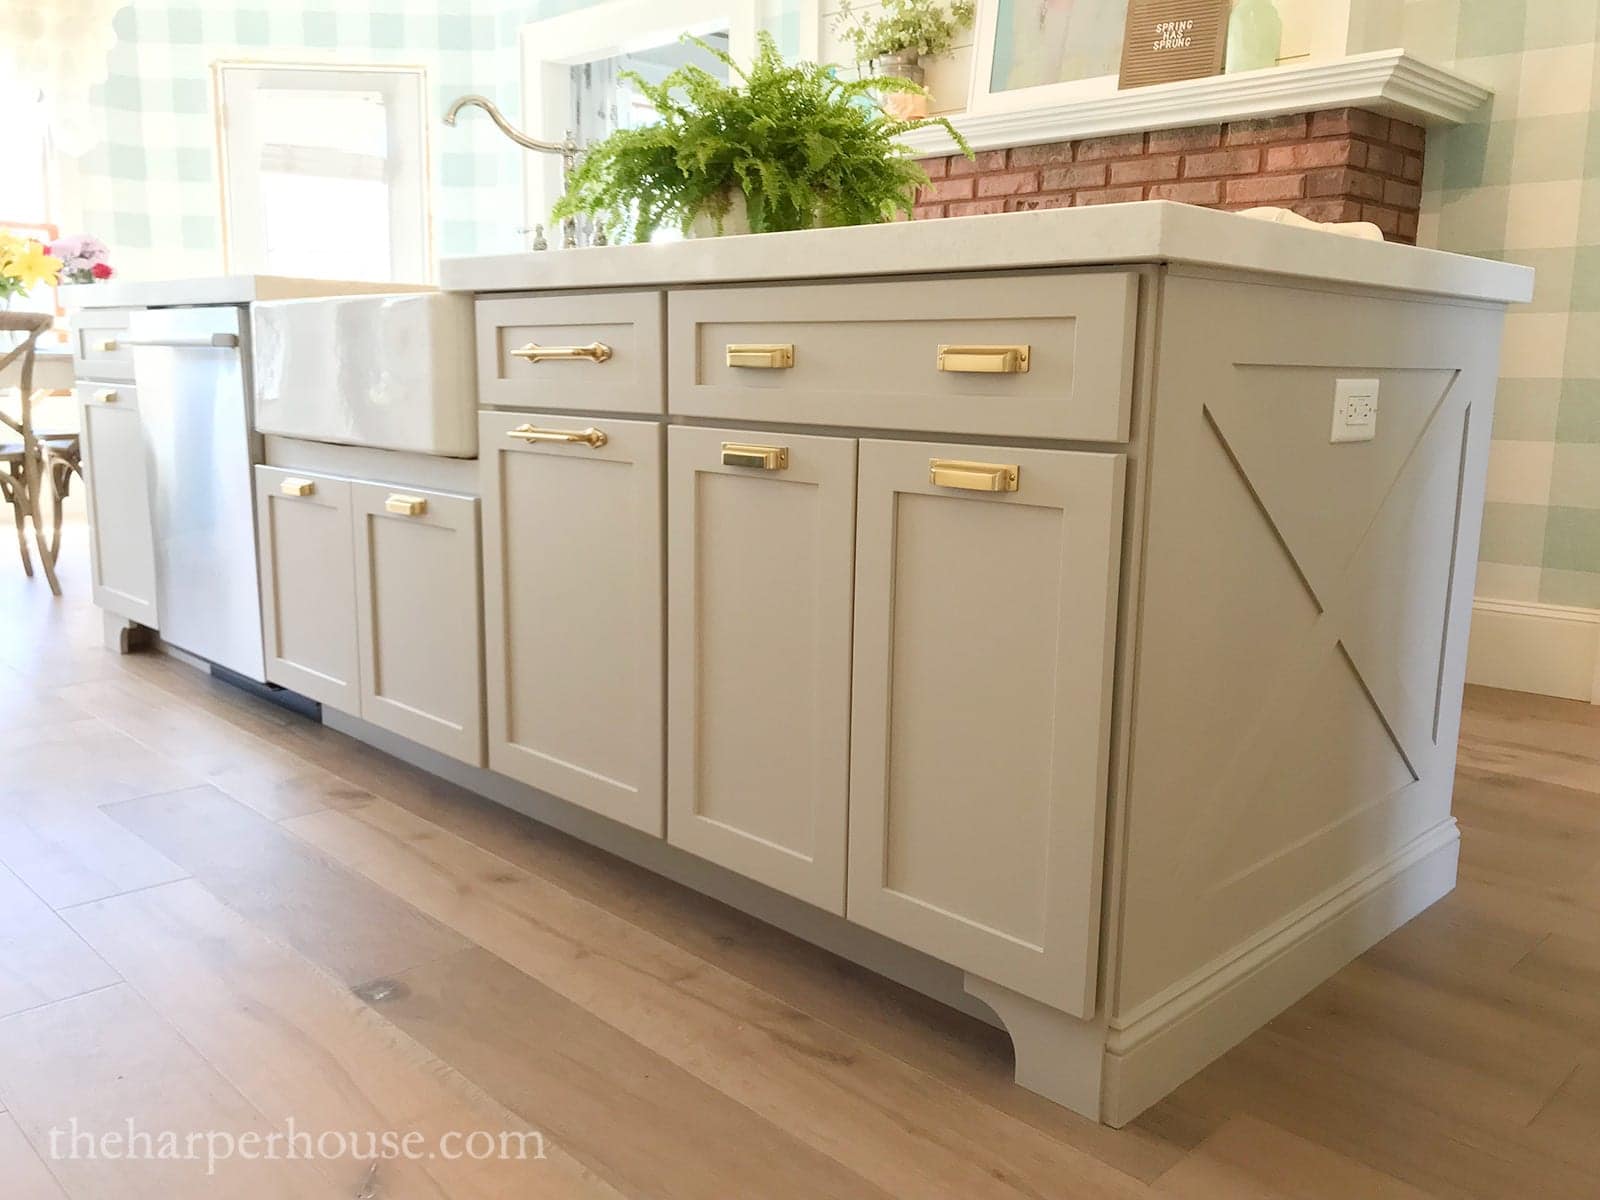
kitchen sink // faucet (similar) // cup pulls // drawer pulls
On the front of the island, Craig built little curved “feet” to add a finished touch to the island. We just drew out a sample on cardboard and held it up to the island to see if we had the size right. Then he cut out the “feet” from a 1×6 board with his jig saw, then sanded and painted to match the island. I love how it turned out!
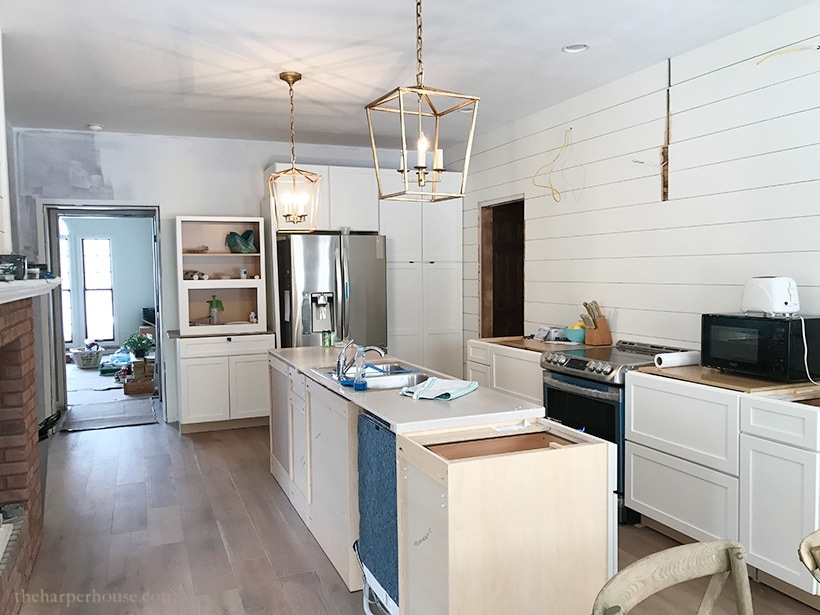
You may have also noticed, our new kitchen pendants. I have been in love with the Darlana pendant lights from Visual Comfort for years and I finally took the plunge and bought them for the kitchen. I think the gold color adds some much needed warmth to the space. I ordered the small size from One Kings Lane when they were having a 20% off sale and they arrived in one week!
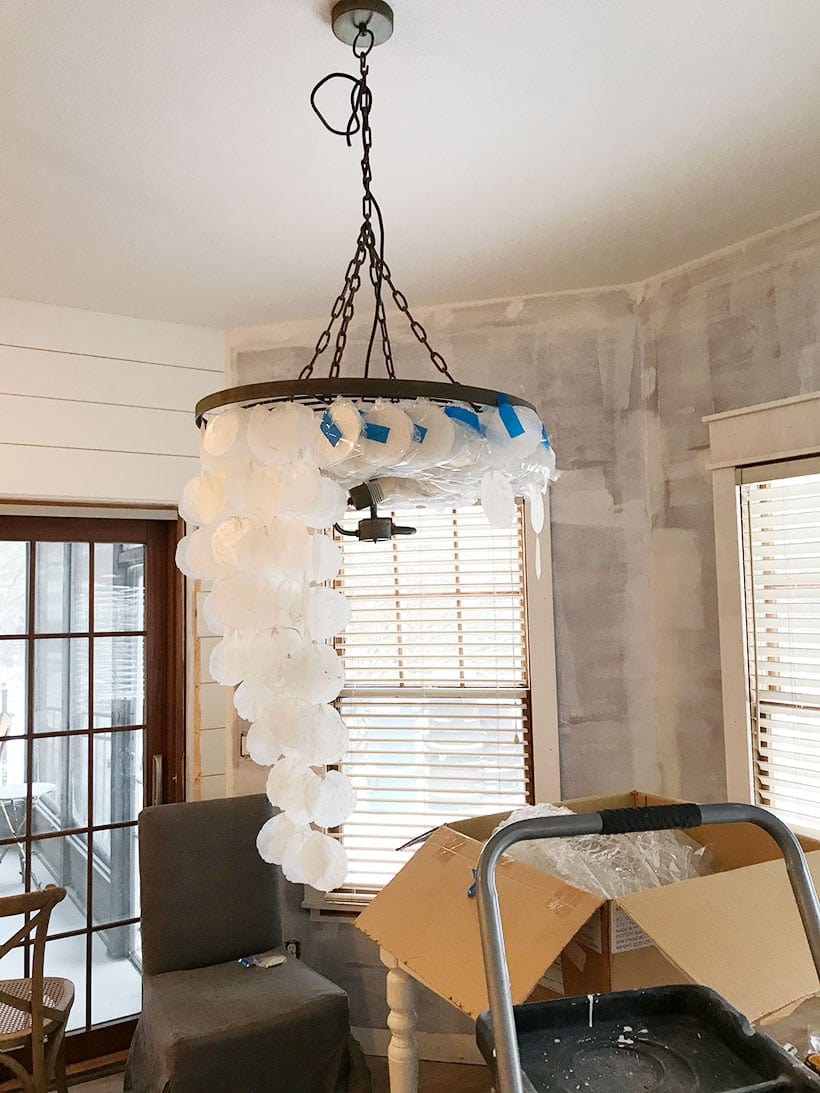
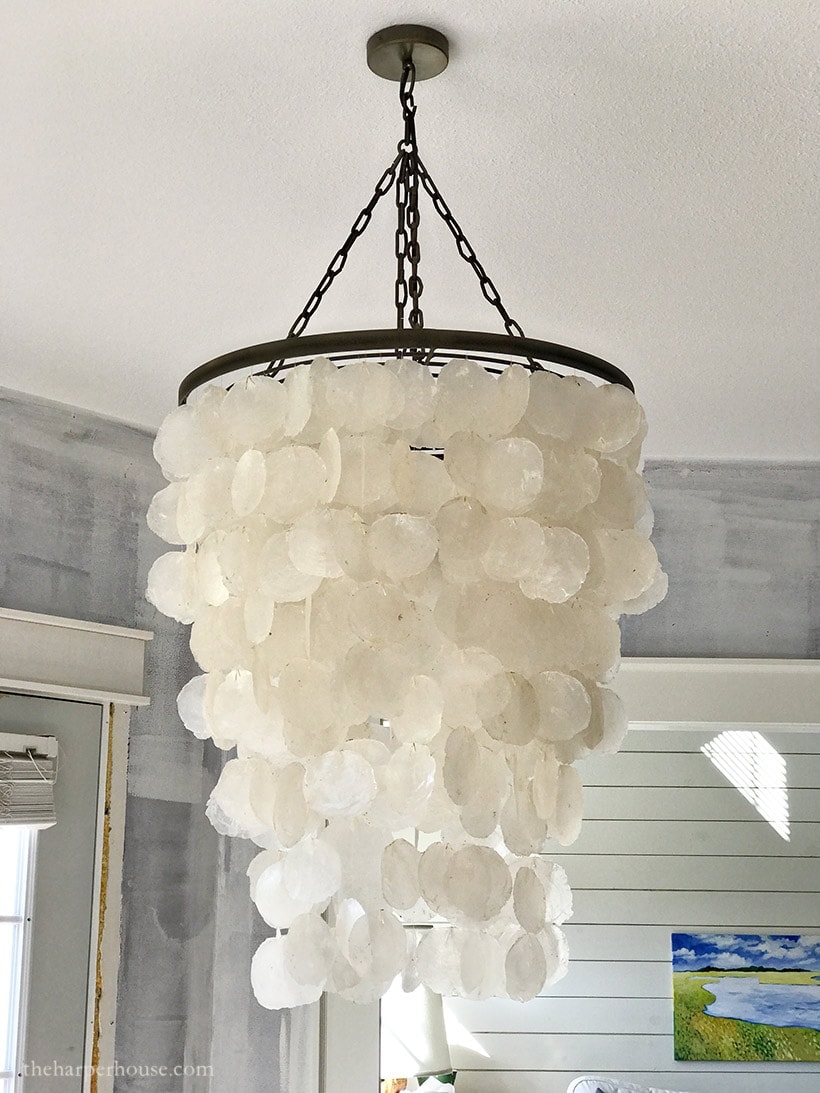
For over our dining table, I was finally able to use this gorgeous capiz chandelier that I bought from Pottery Barn about 8 years ago. We had originally planned on building a giant farmhouse on 10 acres until God told Us No. So this was one of the light fixtures I had purchased in the hopes of putting it in the new build and it had been sitting in our attic ever since. So glad I finally found a home for it!
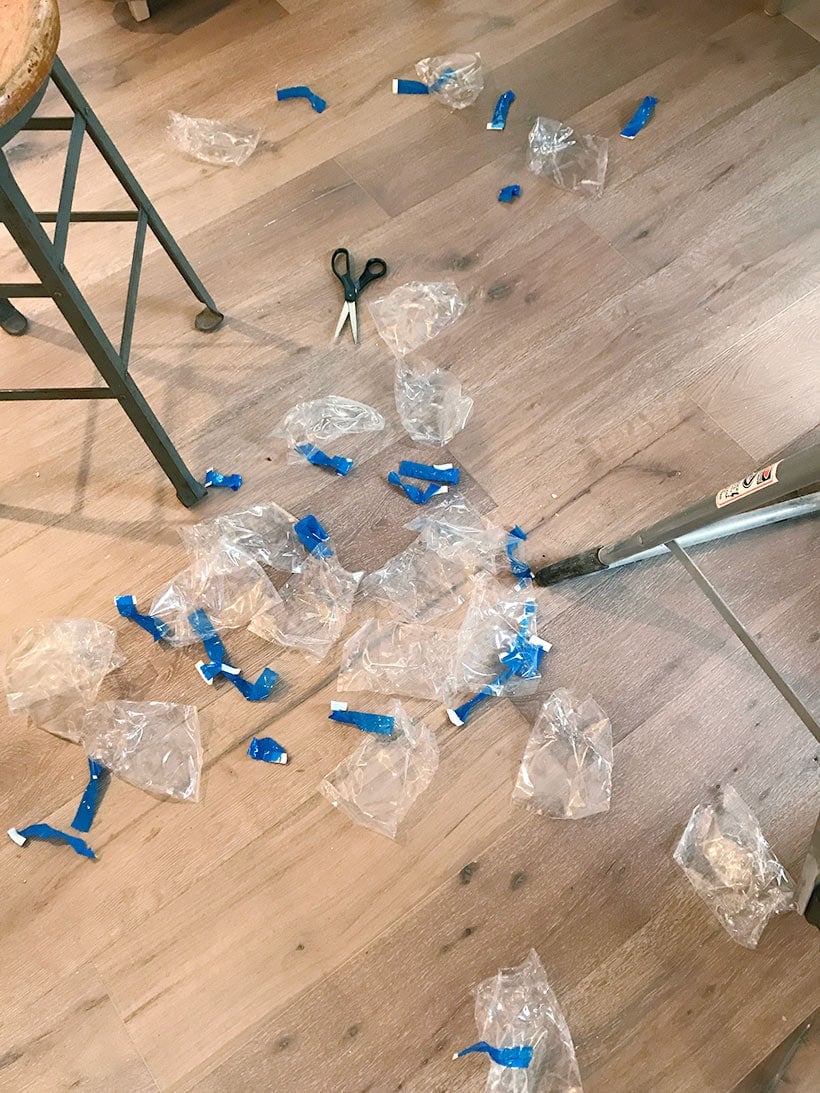
I love it…but that thing was a PAIN to unwrap. There were about 100 strands of shells and each were INDIVIDUALLY wrapped. Took me about an hour to finally free all those shells. But it was worth it. I love how it looks and it’s large enough to make a statement, but still coordinates really well with the Darlana lanterns.
Unfortunately, Pottery Barn no longer sells this particular chandelier but I’ve found some similar versions: this one is only $233 and this one is a bit more modern but SO gorgeous! And here’s an even cheaper version with teardrop shaped shells, so pretty!
The kitchen is starting to look like a real kitchen finally – this week, we’re trying to design the stove hood but I can’t decide what kind of wood to use… I want something light and a little rustic. Do you have any ideas? Share with me in the comments!
PIN THIS FOR LATER:


Your island is gorgeous! Well done!!
thank you so much Debbie!
Hi Christy. First of all, absolutely love the kitchen and the island is amazing!!! I had the same idea on the X design on the sides so this couldn’t be more perfect timing. Question … the cabinets that you used throughout the kitchen, where did you get them from / brand as I really love the style of the doors.
Disregard … I found your earlier blog with the cabinet details =). Thanks for always sharing such great details!!
aw, thanks for your sweet comment Tina! Yes, we purchased these cabinets at our local Menards (they are the Medallion brand) Super affordable, soft close drawers, great color options, lots of customization options as well (although the more you customize, the pricier they will be.) I hope to write another post soon with more details (still waiting to get some good photos.) Hope this helps!
Did you paint with a sprayer or a gold old fashion brush? It looks amazing and very high end. Im trying to convince my husband to do the same for our island i got quotes to get black shaker cabinets with these X end panels and everyone keeps saying 6000-7000 which is over our budget for just the island.
Thanks so much Erin! Craig just used a good ol’ fashioned brush! The caulking makes a big difference, so do that prior to painting. I would definitely recommend trying to diy your own island – it’s not super hard and you could save a ton of money! Good luck 🙂
Great post! Can you ask your husband how he figured out what angle to cut the x boards at the ends? Did he use a protractor?
He did not use a protractor. He just found the center line of the angle, then extended the 2.5″ board past the edge to find the place to mark with his pencil for the angle cut. I’m sure I am not explaining this very well….it’s really hard to explain without a visual. Sorry!
No worries. I think I can figure it out with a few trial cuts lol. Do you have any more pictures of your island finished?
I will try to add some more pics to this post this week – just got back from vacation 🙂 Good luck with your project!
Very detailed post! I’m working on a custom island design and this is perfect. I appreciate the details and the close up photos of how you guys did this!
Thanks,
Kevin
You’re welcome! So glad it was helpful – thanks for stopping by 🙂
What is the distance from the island to the fireplace?
from the edge of the island countertop to the fireplace is 40″
Beautiful work!
May I ask how wide and thick the uprights on the back of the island were kept at?
Love this. I’m doing something similar for my wife. What did you do up front under the cabinet where there is notlrmally a cut out for your feet when your standing close to the cabinet?
Thanks so much Brian! Are you talking about the toe kick on the front of the island? If so, we kept the toe kick on the front, but my hubby added cute little “feet” on the corners. We just decided on an angle and made a cardboard template and cut them out of wood with a jig saw, then painted to match the island. I think it gives the cabinets a more custom feel and adds a nice finished touch to the island. I’ve added another pic to the post so you can see what I’m talking about. Hope this helps and good luck with your project!
We “loosely” took your idea and created a 60″ x 40″ island in an airbnb we rehabbed. We actually used 2 IKEA cabinets and set up the microwave to go in the end. In the end, we used a “cheap” IKEA walnut top that we didn’t care if it was damaged. We get compliments on the kitchen all the time from guests.
Here are a few process photos.
https://www.dropbox.com/s/qr6ueb21awdfdkj/1.jpg?dl=0
https://www.dropbox.com/s/dbdjxsiqc9jk8p1/2.jpg?dl=0
https://www.dropbox.com/s/a5g08qy08ry2e8t/3.jpg?dl=0
https://www.dropbox.com/s/ox3kbpsn89of2hi/4.jpg?dl=0
https://www.dropbox.com/s/4f7hpicvoow2tji/5.jpg?dl=0
https://www.dropbox.com/s/0bb760dk1wlo9dk/6.png?dl=0
https://www.dropbox.com/s/o7o35jhk2l4995o/7.png?dl=0
https://www.dropbox.com/s/wwu6uz4woyxs6xq/8.jpg?dl=0
Thanks,
Kevin
WOW! Kevin, that looks absolutely amazing! Great job!! I love the walnut top too. We’ve used Ikea butcher block counters in a previous house and were super happy with them (especially for the price!) The whole kitchen looks fab – bravo! Thanks so much for sharing 🙂
can you tell me what these floors are i love them.?
Thanks Max! Our floors are engineered white oak from BuildDirect 🙂
Beautiful! We are about to start work on our kitchen/island/ floor Reno and I noticed your floors. I love the colour! Do you mind sharing the details on your floors?
Thank you Tricia! Our floors are engineered white oak from BuildDirect. We’ve used them in 2 houses now and we love them – and they are really affordable too!
Beautiful! We are remodeling our kitchen and getting ready to do a custom island ourselves. I love your flooring. Can you tell me the Brand/color please?
Thanks so much Lori! Our floors are engineered white oak from Build Direct – this is the exact color. We’ve used them in several homes and have been very happy with them (and they’re actually super affordable!)
Love it!! Thanks for sharing! We are also doing a kitchen Reno. I pinned your post for ius tonrefrbece back to.
Quick question- how did you secure the cabinets/island to the floor?
So glad it was helpful 🙂 I asked Craig about attaching the cabs to the floor and he used a method similar to this. Basically he attached 2x4s to the floor to serve as a cleat and then slid each cabinet over those and screwed the toe kick into the wood cleat. I’m probably not explaining it very well, but the pic on that site linked should help. Thanks for reading!
Stumped on your blog, love it! We are renovating our kitchen as well and I thought it be create to add an island. We will use our blog as a reference. I appreciate your post!
Quick question- how did you guys secure the cabinets/island to the floor?
Custom island looks amazing! Love all the details! I’m in the process of doing ours, and I have just a few questions.
The base that the cabinets sit on,, did you make one long base for the entire island? Or did you make it for each cabinet section?
The 40″ end pieces, did you basically frame 2x4s every 16″ apart and then put the sheet and trim on?
Hi there! I’ll try to answer your questions as best I can. We didn’t create a base for the cabs. Each cabinet is individually placed on the floor, and screwed to a 2×4 cleat that was previously screwed to the floor. This is a good tutorial on how to install kitchen cabs (scroll through Step 6 Set the peninsula cabinets for a good pic of what I’m talking about.) To create the 40″ end pieces, we just added a 16″ mini wall using 2x4s to the back of the cabinets after they were installed (24″ cabinet depth + 16″ mini-wall from 2x4s = 40″ total depth.) You can kind of see this in the third picture of my post. We then covered the mini-wall and cabinet ends with 1/4″ maple plywood, then trimmed everything out. Hopefully this info helps and good luck with your project! 🙂
Hi there. Did you need more supports in the center to support the granite slab, or were the side panels enough?
Hi Kevin – we did not put any supports under the island as our countertop company said it wasn’t needed. However, it probably is a good idea to error on the side of caution and add some additional support if you think it’s needed.
Did you miter the long edges of the trim boards when attaching to the 2x4s?
yes, he did miter those edges. You can see more detail in the third picture of this post 🙂
This is beautiful! I am in the processes of updating my kitchen and love the color of your island. Do you know what the color is called and the brand you used? Thanks in advance!
Hi Laura – we used a custom paint color to match the factory finish of the cabinets (I believe the cabinet color was called Chai Latte by Medallion) But a similar paint color is Fieldstone by Benjamin Moore.
Hello we absolutely love this island. Do you have any actual plans that you used before or after the fact that we may be able to model after. We have an existing island with a higher shelf counter top and backsplash that we are going to demo and then have quartz countertop overhanging which I think would be perfectly supported by your design. Essentially building the same/similar wall on the back of our existing cabinets and dishwasher. Any help you can offer would be amazing. Please and thanks
Hi Greg! Unfortunately, we don’t have any actual plans for the island. So sorry! It’s pretty straight forward though – we just extended each side of the island with the mini 2×4 walls, then wrapped them in the plywood and added the x pattern. Then also added some plywood and finishing trim to the back of the island to pull it all together. Make sure to caulk really well to fill in all the cracks prior to painting. Good luck!
How did you attach the 2X4 wall? Did you secure to the floor?
yes, my husband secured the wall to the floor with screws (he’s not home so I can’t ask exact method, but he is familiar with building codes, so please reach out to your local carpenters or contractors for their recommendations)
Hi! First of all, this looks great. We are currently in the process of trimming out our island and I wanted to know what the very small, thin piece of trim you used between the countertop and the wood is? Thank you!