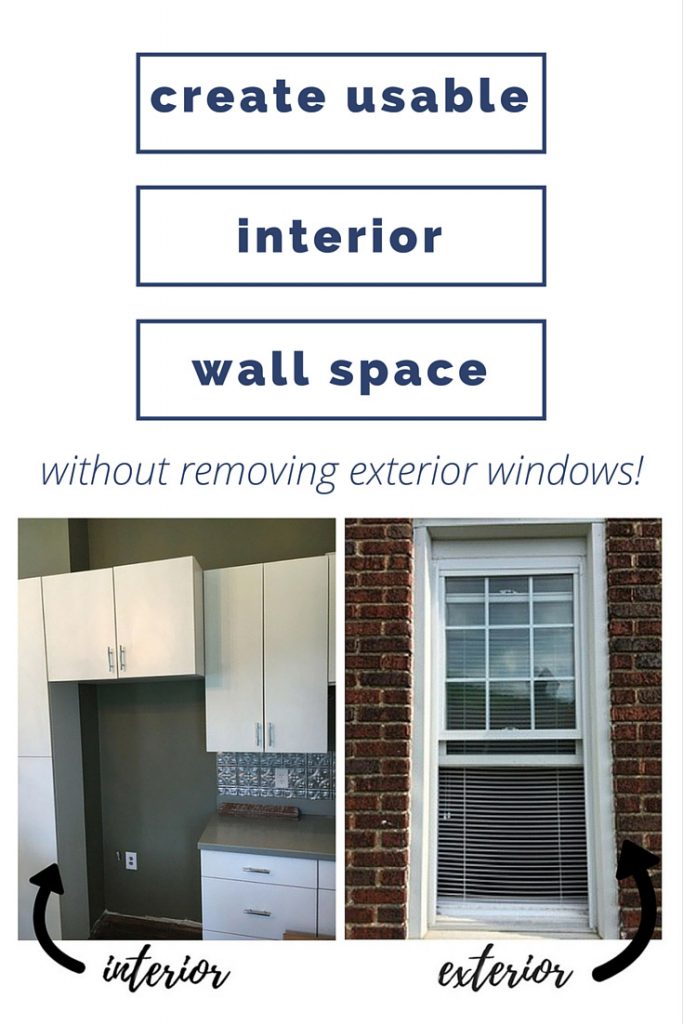
create usable interior wall space without removing exterior windows!
You guys! Since I’ve been soooo busy with the move and getting our house on the market, my good friend Melony from Sledgehammer Queen offered to write a guest post on a fabulous trick she used in one of her recent flips! You are gonna LOVE this remodeling hack. And be sure to check out her blog for more details on her awesome house renovations.
Hi, I’m Melony from SledgehammerQueen! I want to thank Christy for allowing me to guest post on The Harper House! I love reading about the flips that she and her husband do. I’m currently on the prowl for shiplap so I can recreate some of the projects Christy does!!
My husband and I also flip houses in the little town of Hooversville, PA. Our town was a mining town, and like lots of little communities across America, the world has moved on to bigger and better. People tend to look down on communities such as this, but I’ve lived here for 34 years and I have to say, it’s a great place to live.
We have the beauty of the Allegheny Mountains all around us, and for a community of 700, we have a hardware store, two grocery/sundry stores, a post office, a bank and an eating establishment!! Our goal is to encourage others in surrounding communities to see the beauty in this town and to want to live in such a wonderful community.
Today, I want to share with you our solution to one of those nagging problems- how to eliminate a window in a brick house and make it look great on the outside of the home; so here’s our take on this dilemma:
When renovating houses, sometimes it becomes necessary to eliminate windows to reconfigure the layout of rooms. I find this most often happens with kitchens. My hubby and I tend to work on old houses, so often, in the kitchen, there are doors to the basement, doors to the the dining room, doors to the hall and maybe even the back door! Then there are 5 foot tall windows and old fashioned hot water radiators to work around. This leaves about 3 feet of usable wall space to hang cabinets on (I exaggerate a bit, but not much).
We also tend to knock down a lot of walls to create open floor plans, but then you have even less wall space to work with to configure the cabinet arrangement. The good news is, since the walls are down, now the light from other rooms’ windows tend to light up the kitchen, so you can eliminate a window and there is still plenty of sunlight streaming in.
Now, here’s the dilemma- what do you do when the house is brick? I’m okay with taking windows out when I know I will be re-siding and no one will ever know a window used to be there. What are your options with brick? Put a piece of wood in the opening and paint it to match the brick? I have always felt that it wasn’t an option to remove a window in brick because I just don’t like this look. Then, inspiration struck!
In our Water Street House there just wasn’t a logical place to put the kitchen cabinets unless we removed this window.
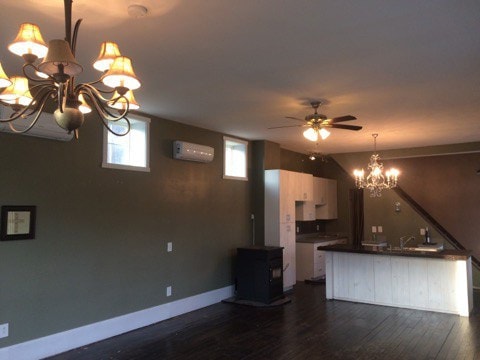
Now, we actually eliminated this window a couple of years ago. It was located in the corner of the room beside where the tall white cabinet now resides.
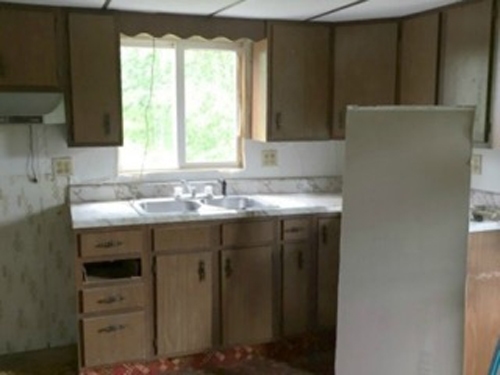
Since we can’t go back and show you exactly how we did this, my awesome hubby, Bill helped me do a mock-up of the procedure. We did the mock-up in an old house (the Riverhouse) that we haven’t renovated yet, so hold on to your hats, the following pictures are a little scary!! Here’s an overview of the kitchen (beautiful isn’t it?).
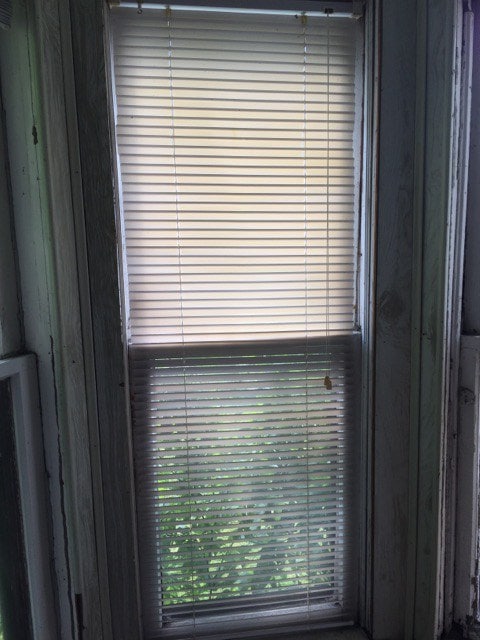
Here is the window we “eliminated” in our demo.
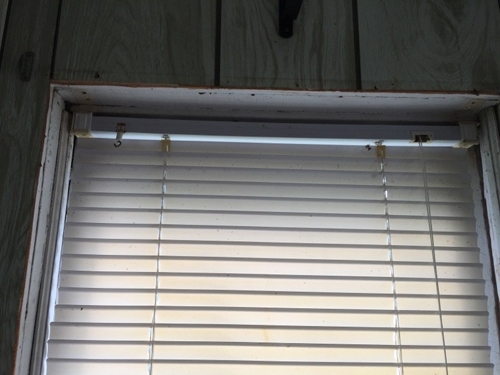
I chose this window to do this demo on because it was one of the only ones in Riverhouse that still had a mini blind in it. The mini blind is an important part of this procedure, so even though it’s dirty and gross, at least I didn’t have to buy one 🙂
We re-installed the mini blind brackets to the surface of the window so that we would have the maximum amount of room left after the next step, which is to install particleboard over the mini blind. When we did this technique at Water Street, we painted the outside of the particleboard black (You will see this down below). For this demo, we just installed the particleboard unpainted.
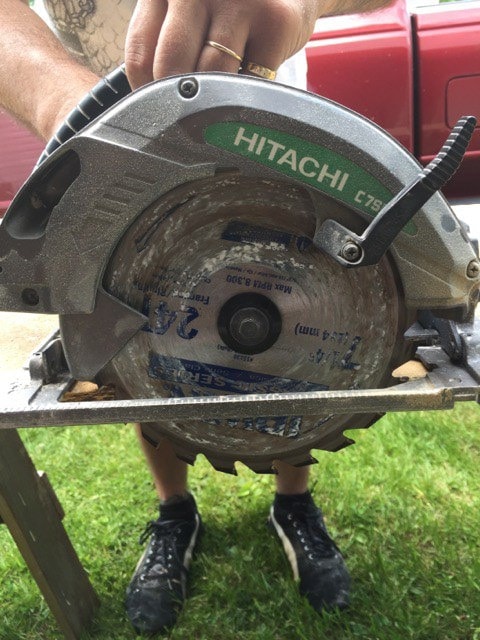
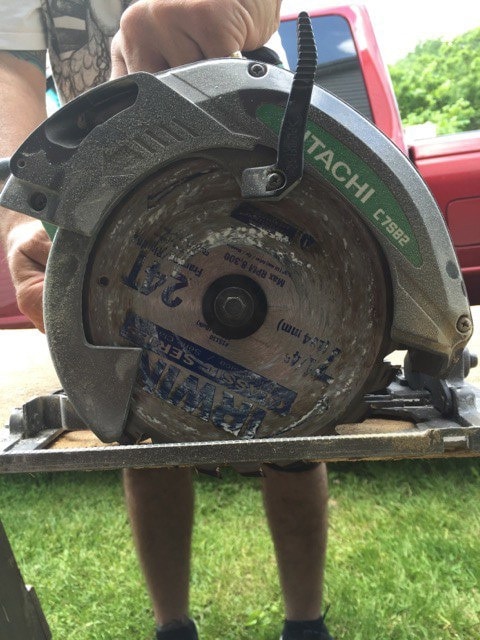
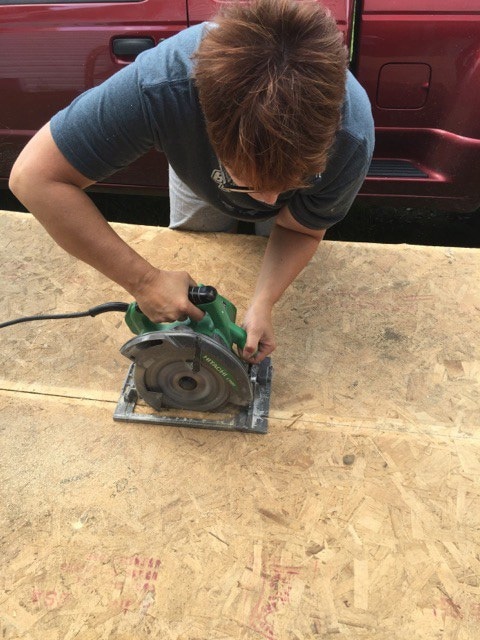
For those of you not super familiar with circular saws, we thought we’d also show you how to adjust the circular saw for the correct depth to cut through the plywood. In the above photo, you can see how far the blade is below the guide. This would be the proper depth to cut a thicker piece of wood.
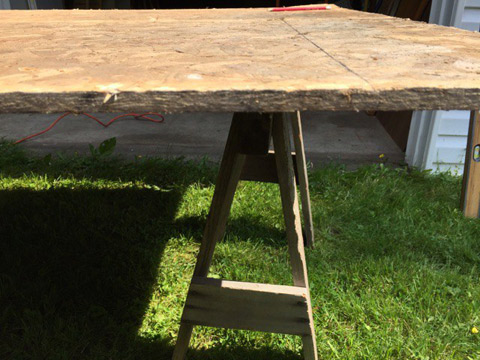
Adjusting the blade is accomplished by releasing the lever at the back of the saw, and then moving the blade up or down depending on what you are doing. We wanted to cut through the plywood without cutting through the sawbucks, so you can see, the depth of the saw needs to be very shallow as our particle board is only 7/16″ thick.
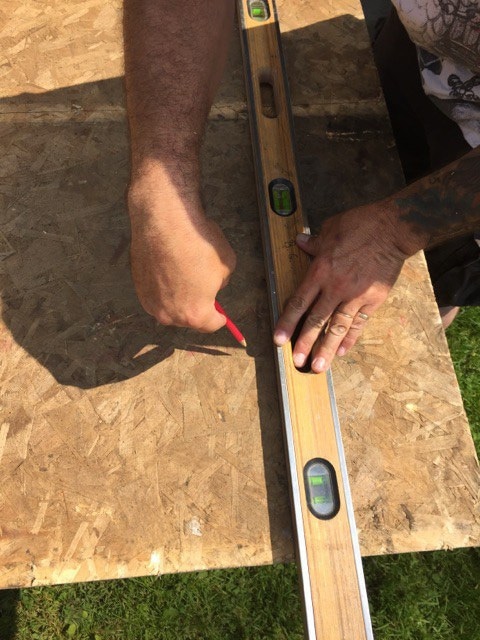
After we got the correct depth (above), we then measured the opening of the window and then marked and cut the particleboard to fit. Disclosure– the window opening was REALLY crooked, so it took us 4 adjustments to get the particleboard to fit. Hopefully your house is much straighter than this old beauty.
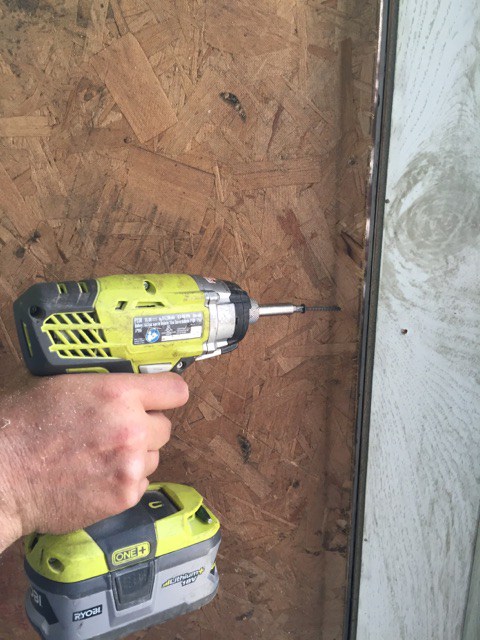
We then attached the particleboard to the stops at the side of the window with screws. At Water Street, Bill also caulked around the edge of the particleboard to keep dust and bugs out of the house.
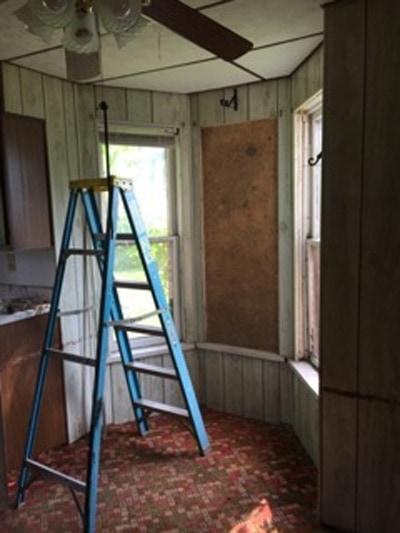
Here’s an overview of the window covered with the particleboard. Please ignore the white paneling! (Hello 1970’s). This house has this great bump-out on both sides of the house. Obviously, I would never cover up a window in such a cool feature, but again I picked this window because it had the blind 😐
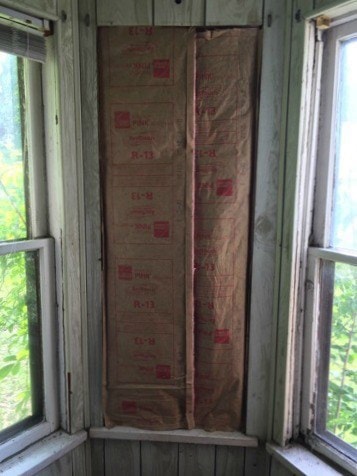
We then installed insulation over the particleboard. At the Water Street house, the walls are 15″ thick so it was really easy to install a nice thick layer of insulation. At this house (and at most houses) the walls are a standard thickness, so I removed half of the thickness of the insulation and then installed it.
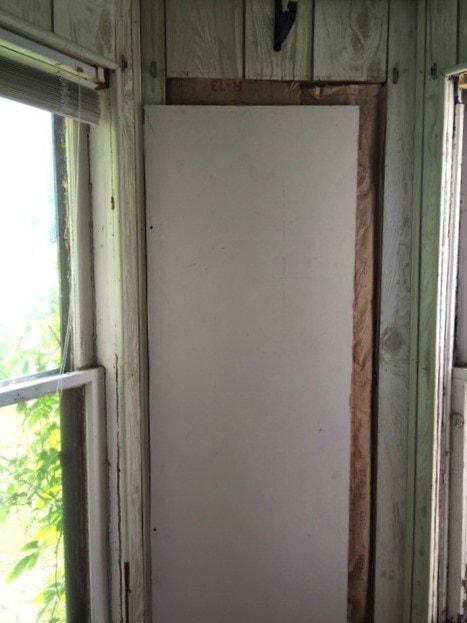
Here is a close-up of the drywall then installed over the installation. We used a spare piece of drywall to just give you an idea of how the window opening would disappear and you would have a new blank surface to work on. You can see a glimpse of the insulation (and of course the particleboard) under the edge of the drywall.
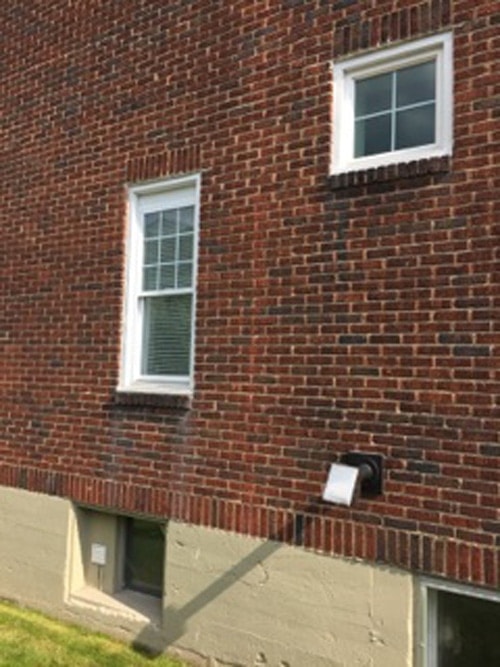
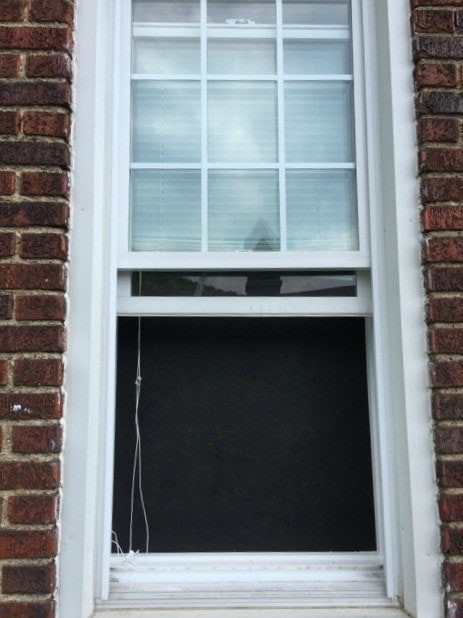
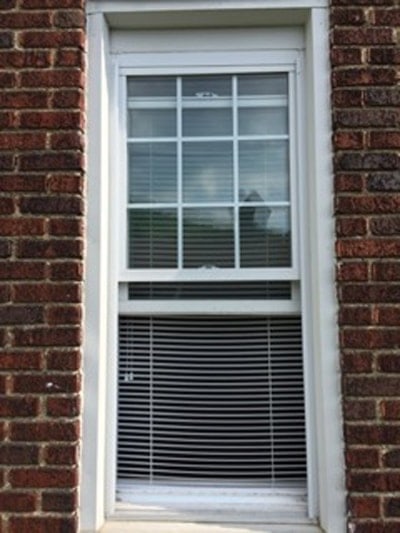
Here’s what this window looks like from outside now. It looks like you have the blinds closed, but read on because at the Water Street house, it looks even more realistic.
At the Water Street property, first we installed a brand new window so it would match the other windows we replaced, and deliberately left it unlocked. We then installed a brand new mini blind. Leaving the window unlocked allows for future maintenance, such as keeping the inside of the window opening clean or replacing the mini blind.
I’m sure we will have to be contortionists to address these issues, but worst case scenario, we can simply remove the window panes, fix what needs fixing and then reinstall them. I know eventually the mini blind will suffer from dry rot, but the good news in this case is that the window doesn’t get much direct sunlight because it is shaded by the garage next door. So, if you’re reading between the lines, this window had the worst view of any in the house. The other windows have nice views of the yard and the Stonycreek River which runs along the back yard, so it would have been a much harder decision to decide to remove one of those windows.
To finish the kitchen walls, on the inside we cut a sheet of particleboard to fit the opening and painted it black on one side. From the outside, doesn’t it just look like the window is open? You are looking right at the particleboard.
Just like in the mock-up, we then insulated the opening that was left on the interior side. Over all of this, we drywalled, painted and finished the kitchen.
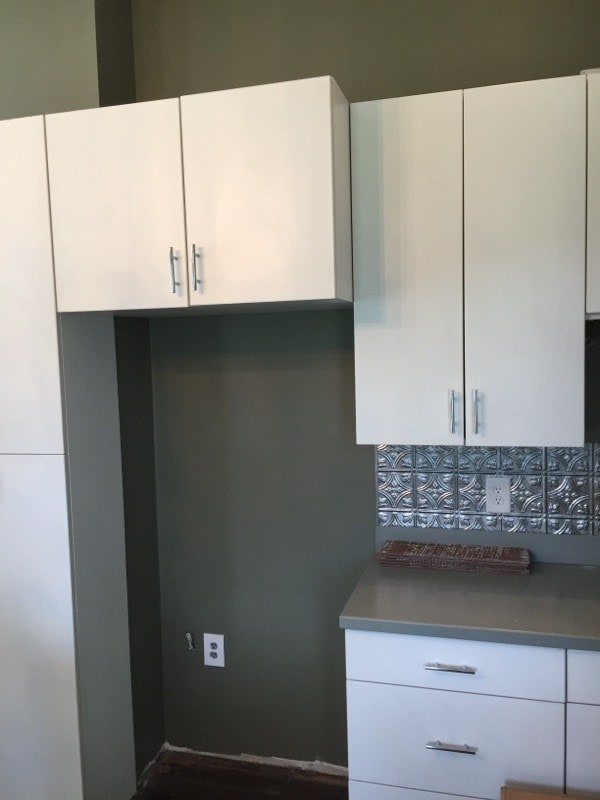
Right where the refrigerator will go, the window is still there, you just can’t see it!
On the outside we have what looks like a perfectly normal window, with the blinds open (and no lights turned on). On the inside we have a complete kitchen with room for a refrigerator. Do you have a situation like this at your house? Will this help you to solve the problem? Let me know!
If you would like my Free Printable on “How to Buy a House, and not a Lemon“, you can find it here. I hope you enjoyed this post and again I would like to thank Christy from the bottom of my heart for allowing me to share this post with you, her awesome readers!
Thanks!
Melony @ sledgehammerqueen.com
pin this for later!







genius!
Yes I’ve been trying to figure out how to do this in my bedroom. Perfect.
how much of a space do you leave between the particle board and the window?
and what happens if the window gets broken for some reason? Can you just take it out and replace it from the outside? Asking because we really want to do the same thing in our living room, so we can do built-ins, and even though i don’t think anything would ever happen to cause the window to break, its a possibilty…do you have any advice for those situations? Thanks 🙂
Hi Tiffany – you can contact my friend Melony who wrote this post. She would be able to answer your questions. Her email is [email protected] Thanks for reading!
I covered windows and I’m now having the glass on the outside crack so they have to be replaced. What should the contractor have done so that the outside window does not crack when the sun hits it after it has been covered on the inside.
Hi Judy, I’d follow up with your contractor with any questions you may have about the windows cracking. Some contractors offer warranties, so you may want to see if you have any recourse with getting them to cover the cost of the replacement windows.
Hi there! My husband and I are about to do this same thing in our kitchen. I had come up with the idea and didn’t know if it was a real thing, so I took to the internet to do some searching of course! We just bought a tiny 975 sq. ft. beach bungalow built in 1931 right on Raritan Bay opening to the Atlantic on the coast of New Jersey. What makes it even better is that we sit on a ‘cliff’ 30 ft above sea level which means we are not even a flood risk! We absolutely love it here and the views are astonishing from practically every window and standing in any spot of our house. When we bought it, someone had already taken some big steps in renovating and modernizing the small amount of floorspace we do have. Its a 2 bedroom, 1.5 bath with both bedrooms and full bath located on the very small 2nd floor created by multiple dormers throughout the years. The main floor is about 630 sq ft and the front door opens to a spacious and wide open living room with a converted front porch room already blown wide open to the main living space. A 6 ft cased opening leads directly into a decent sized dining room with 2 huge windows and a sliding door out to the deck. Then on your left you see a big blank wall with a tiny little 30″ wide opening that leads to….a newly renovated (all new stainless appliances, white cabinets, black granite counters, subway tile), tiny galley style kitchen that is completely and heart-breakingly closed off from the rest of the house. (wah, wah…..). And yes. of course that wall’s load-bearing! But this house and its location were a dream we’ve had and we couldn’t let this one go! So we resigned ourselves to a major kitchen renovation despite the fact that our purchase price already reflected the upgrades that had been done. Ok, ok, not exactly reluctant here, more excited and pumped! lol I get to reimagine the kitchen, and the hubby installs kitchens for a living! We got this. But what we also had was evidently not so uncommon after reading your post! Our tiny, barely 100 sq ft kitchen had multiple whammys preventing a good design and layout. It has a doorway to the basement, one to the dining room, and one to the 1/2 bath. It also has the ONLY window in the house WITHOUT a water view, and instead looks directly into the kitchen of the not-so-friendly new next door neighbors house 8 feet away. Not to mention their home has a putrid peachy-beige and poop brown paint color combination on their extremely dated stucco! I immediately started cursing that window because it was the only thing in the way of my budding-chef dreams to have a gas cooktop separate from an electric wall oven… and hell, why not a built in microwave above the wall oven so that I could have one of those pretty exhaust hoods with the backsplash that goes all the way up to the ceiling behind it! (Hey, dream big. right??) So of course the “kitchen pro” argues with me that you never take a window out of a kitchen and we’re not re-siding the house so we’re not taking out the window! I of course held my ground and spouted off a bunch of counter arguments eerily similar to the words you wrote! “But once that wall comes out, we’ll have plenty of sunlight coming from the dining room windows and sliding door!” “Who cares about this window, who wants to look at the neighbor’s ugly house while doing the dishes?!” “Once that wall comes out the sink can be in the new ‘island’ and it can face into the beautiful new dining room and living room (okay fine, peninsula… We have a working chimney dead smack center of the house and it’s behind the fridge, so we can’t open it up any further, so it has to stay)…I might even be able to see some water views as I’m doing dishes with the new layout!” And then…. the light bulb moment! “Hey babe, why can’t we just paint the window black, frame, insulate, and sheetrock over it???” The stunned, blank-faced look he gave as a reply caught me off guard! The so-called “pro” had never heard this idea before! Never once in his 18 years installing kitchens had a customer ever come to them with an idea like this! And I think my counter-arguments wore him down because …now he thinks it’s a great idea! So long as its safe, and to code… Well, I say we just go for it after seeing your post! With a few tweaks of my initial idea, we can pull off exactly what you have done in your renovation. Thank you so much for this post, I can’t wait til he gets home from work so I can show this to him! 🙂
-Alissa Herman Pollino
Wow Alissa, sounds like you have a gorgeous space to work with! I’m so glad my friend Melony’s post helped you so much! And never let a so called “pro” keep you from doing what YOU want to do! Just because the kitchen pro doesn’t do things a certain way, doesn’t mean that you can’t get what you want in YOUR kitchen. It’s your home and you are paying the bill, so stand fast and make sure they’re listening to your wants & needs or hire someone else who will! Good luck and thanks so much for sharing 🙂
Have you had any problems with condensation?
Hi Allan, my friend sold this house after she remodeled it so I’m not sure. Sorry!
Doesn’t it look funny that window never shows light through it at night when it’s beside windows that light up at
Night ???
I would think it would look strange that no light is ever seen
Through that window
it might look a little funny to some – but honestly, I don’t think people will even notice and it sure beats the alternative!
couldn’t this prove problematic if fire or rescue personnel were needed at the house? What if they were trying to enter via a window that is really a wall? I’m looking to enclose a window in order to use that space on the wall to run a stove pipe/chimney out of. This gives me some ideas but I think I’ll have to remove the window frame either way.
What about condensation from the external window? Are there any issues?
I wouldn’t think condensation would be much of an issue since they installed insulation, etc.. but feel free to contact Melony and she could answer your questions.
Does this violate any building codes?
Hi Jim, I’m not familiar with building codes myself (and I know they differ from town to town) So always check with your own local officials prior to beginning any projects like this. For more information, feel free to contact Melony at Sledgehammer Queen as she’s the one who did this project. Thanks for reading! xo, Christy
How did you seal the window in the outside, did you used calucking? to seal it.?
Hi there!
We are considering options for covering windows and had a method similar to this in mind. However, my husband is worried about keeping the window, if it ever leaks we would be unaware and it would do significant damage before we realize it, since the wall will be blocked by a built in entertainment center. Its a new build (2018) and there is stucco on the outside. We’ve never had an issue with leaky windows (knock on wood) but he’s still concerned. What is your opinion on this? Thank you for the help!
Hi Brandy, I’m sorry for the delay in responding. This actually was a guest post written by a blogger friend of mine. I’ve never actually done this myself as I would have similar concerns as you. Every diy project has pros and cons, and you just need to use your best judgment when deciding how to proceed. For specific questions on the project, you could try reaching out to my friend Melony on Facebook. Hope this helps!
Don’t do this. It’s just a cheap, lazy, quick fix. I actually found this article because I recently bought a house where the previous owner did this exact thing and now I’m researching how to fix their mistake. No surprise a flipper is suggesting to do this, especially suggesting to put cabinets over it so that the homeowner has to rip it all out when there’s a problem, they are not trying to put out a quality building, just something they can make quick money off of, it’s sad. If you’re reading this article, do not go this route, have pride in your home and follow established building standards.
Thanks for your opinion Ben! This was a guest post written by another blogging friend of mine, we did not do this on our remodel. I do advise everyone to do their own research and weigh the pros and cons of any kind of remodel or house updates. Also check with local building codes and permitting authorities before taking on any new projects. But the great thing about living in America is having the freedom to make your own decisions with your own property, so to each his own!
This is a very bad idea. As an architectural technologist, I can say there are many problems with this. Vapor condenses on the inside surface of windows. Because it is covered up that water has nowhere to go but trickle down into the wall, where it can cause water damage and rotting. The reason so many houses have supply air vents under windows is because they are needed to help keep the air dry and dry off condensation in cooler weather. This ‘solution’ eliminates all the fail safes for drying up condensation. You should either design around your existing windows or completely remove them and build a proper wall that is insulated with the air and vapor barriers sealed to the existing building’s barriers. Anything else is asking for trouble and expensive repairs down the road. Be wary of quickly flipped houses that might do things like this.
I appreciate your thoughts Maurey! As mentioned before, this post was a guest post written by another blogger. I have never personally attempted anything like this. I definitely encourage any homeowner to do their own research and weigh the pros and cons before undertaking any home projects. Also, check local building codes and get all necessary info needed to comply with local building authorities.