How to Remove Tile Floors
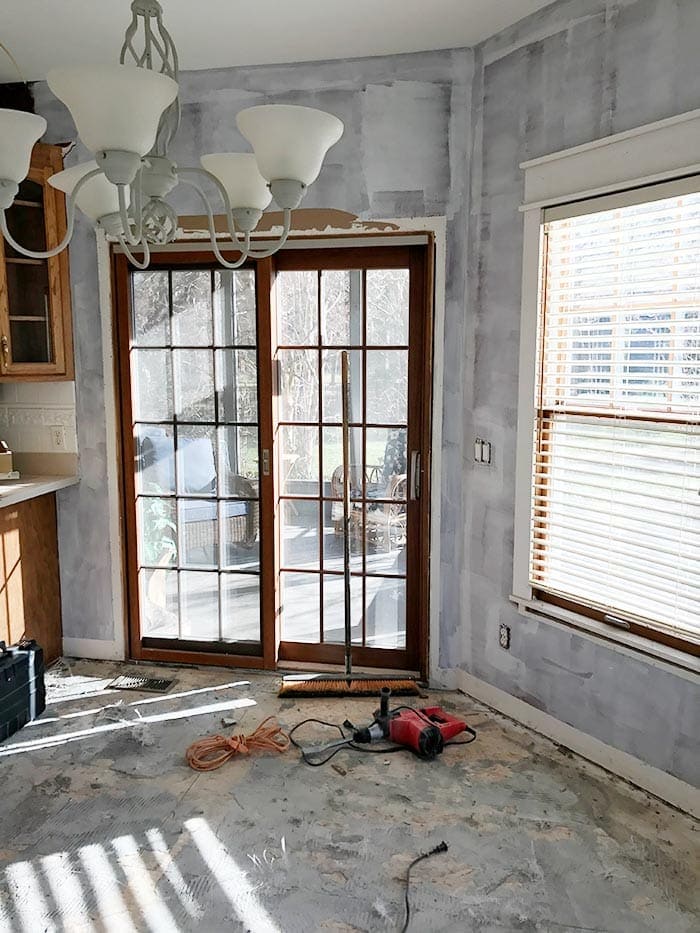
I’m back to share some Harper House Reno updates with y’all! If you missed it last week, I tried to get you all caught up with what was happening with our house reno. And the day after Thanksgiving, my awesome hubby started demo on our kitchen! I don’t know why Chip loves Demo Day so much, because honestly folks…. it’s not fun. Especially when you’re living in the midst of all the chaos. But it does mean progress, and since I thought we would have this kitchen done back in March… I’m happy to finally be getting started! So keep reading for some tips on how to remove tile floors.
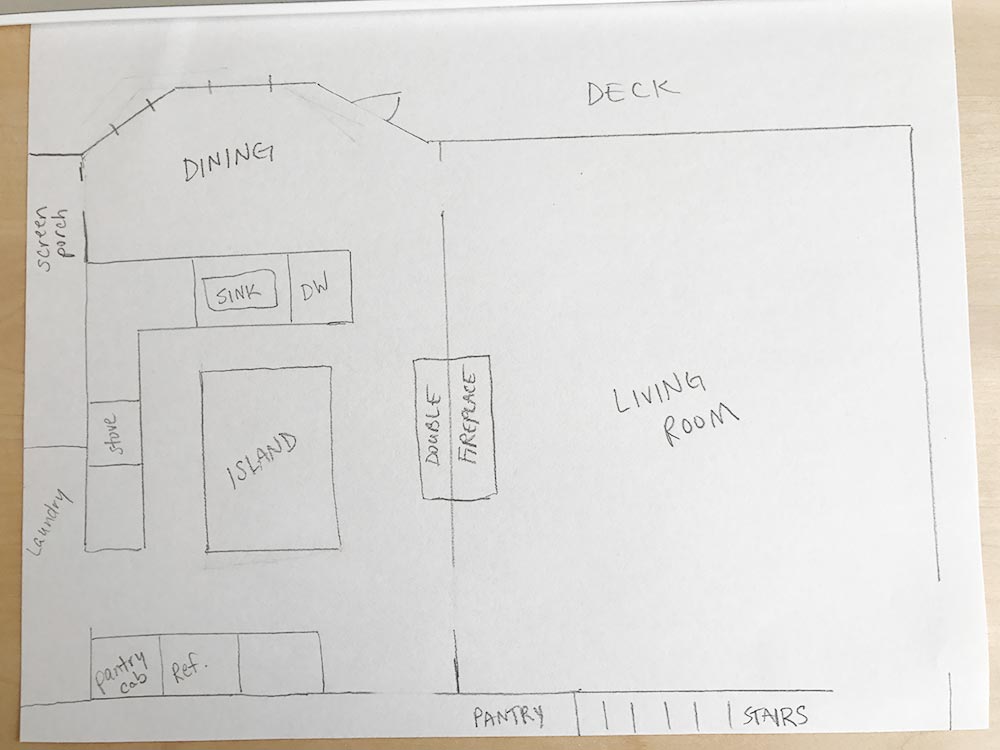
I thought I would use my awesome drawing skillz to draw you all the layout of our old kitchen.
Don’t judge.
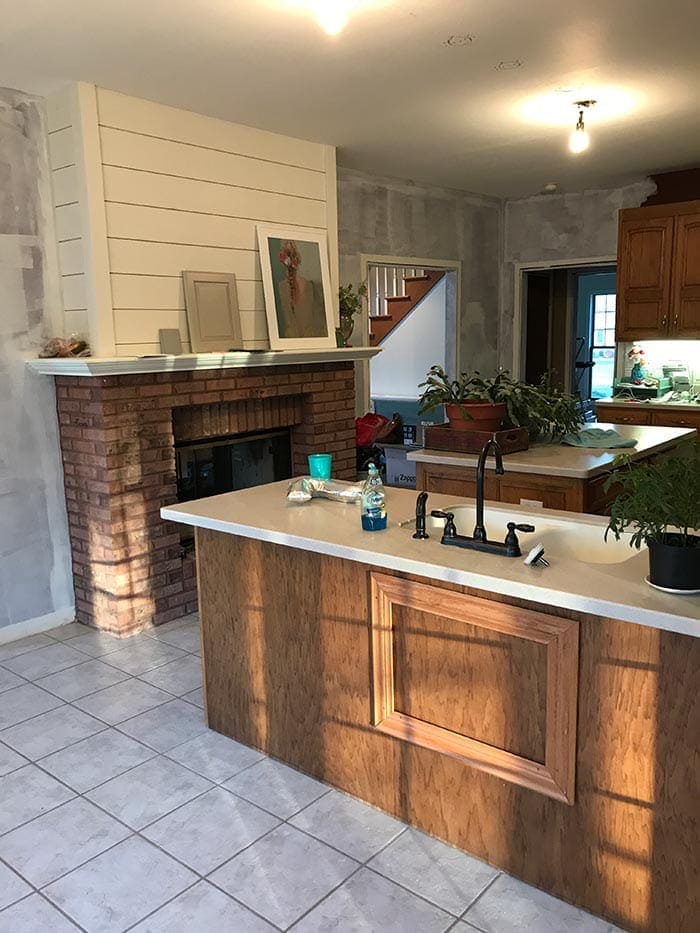
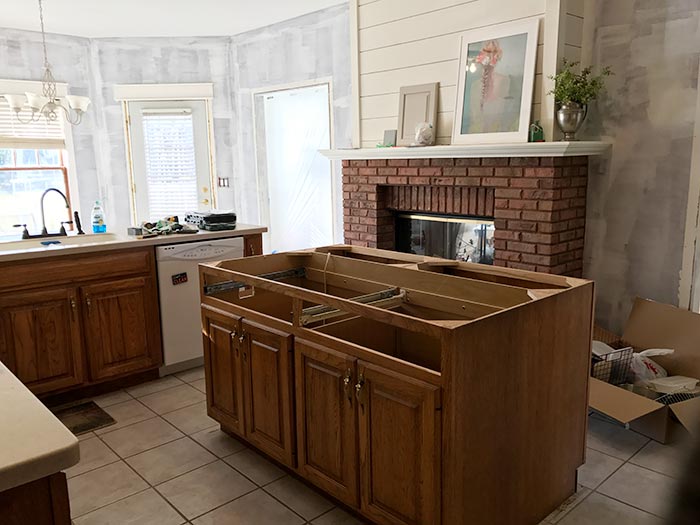
So basically, the kitchen and living room are separated by a huge double sided fireplace. We are still trying to figure out what to do with it – it was originally wood burning, but somewhere along the line it got converted to gas. But I have always wanted a wood burning fireplace so I had Craig convert it back to wood burning. Which was great…
Until the first fire almost smoked us out of the house. We’re not sure why, but the fires are SO smoky. We think it has something to do with it being double sided and air flow does not draw correctly up the chimney. So now I think our next step is to get a wood burning insert… but more on that later.
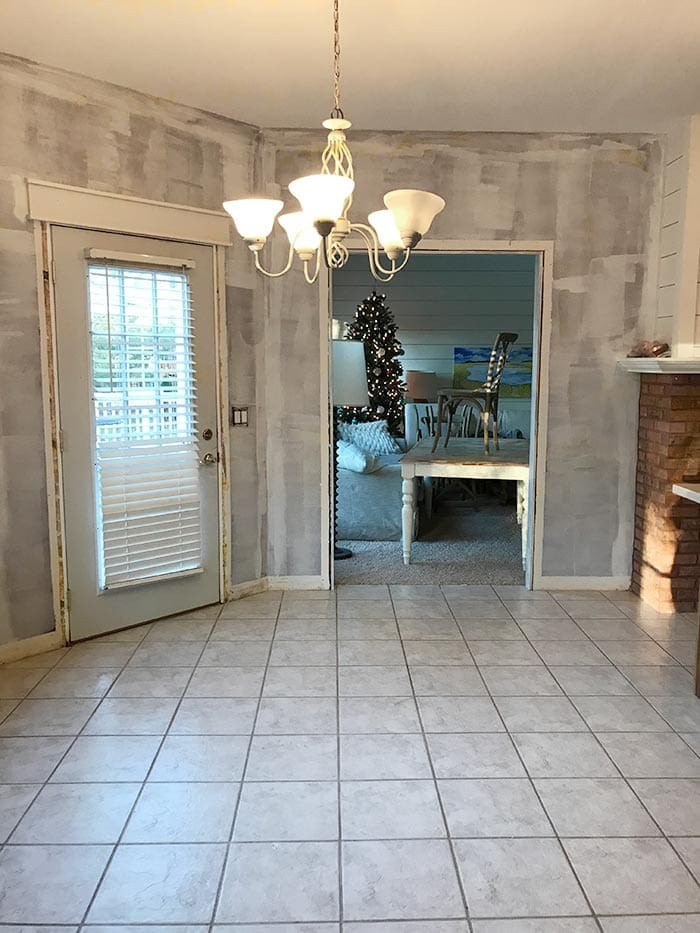
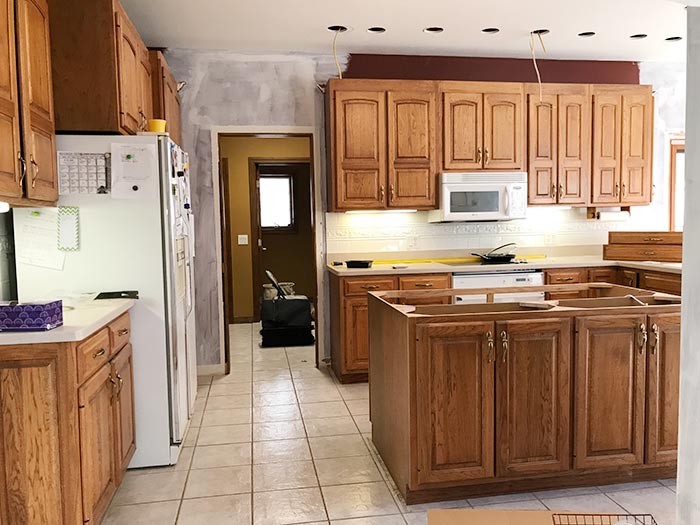
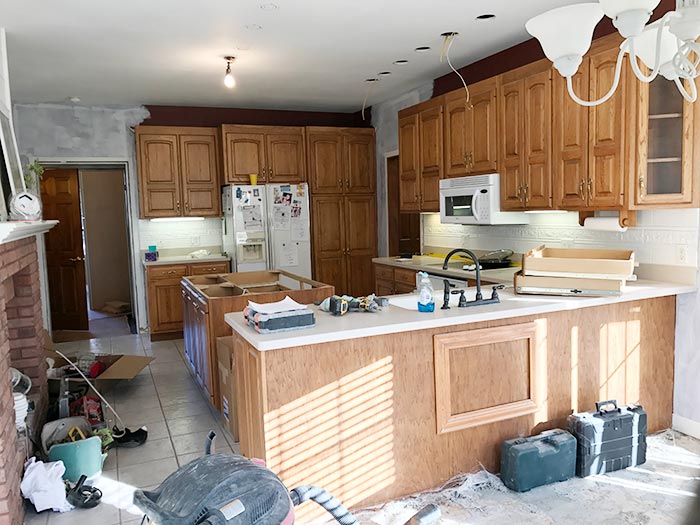
So in true Christy fashion, I have no idea where my “before” kitchen pictures are – but just envision this same kitchen with dark burgandy/reddish walls courtesy of the late 90’s. My new plans for the space include chopping off that sink peninsula which drastically inhibits work flow. I hate having to walk around that thing to put food on the table. So the new plan is to expand the island to 10 ft and put the sink and dishwasher in the island. I’ll post my full moodboard and plans soon.
But first up in the demo process was getting rid of the old tile floors… which was NOT easy.
How to Remove Tile Floors
SUPPLIES NEEDED (affiliate links)
Pulsing Hammer Drill with Tile Chisel Bit (Craig used this drill that he purchased locally, but those listed are easily available from Amazon)
Shop Vac – for vacuuming up debris and containing dust
Dewalt angle grinder – to remove stuck mortar from sub floor
Dewalt diamond cup wheel – to use w/angle grinder
dust shroud – to contain dust in shop vac (this is a MUST as it’s extremely dusty!)
Shop Vac adapter – to attach dust shroud to shop vac
Plastic sheeting – to cover doorways to keep all the dust in the kitchen and not spread throughout the house!
Dust masks gloves, garbage cans, knee pads, safety glasses


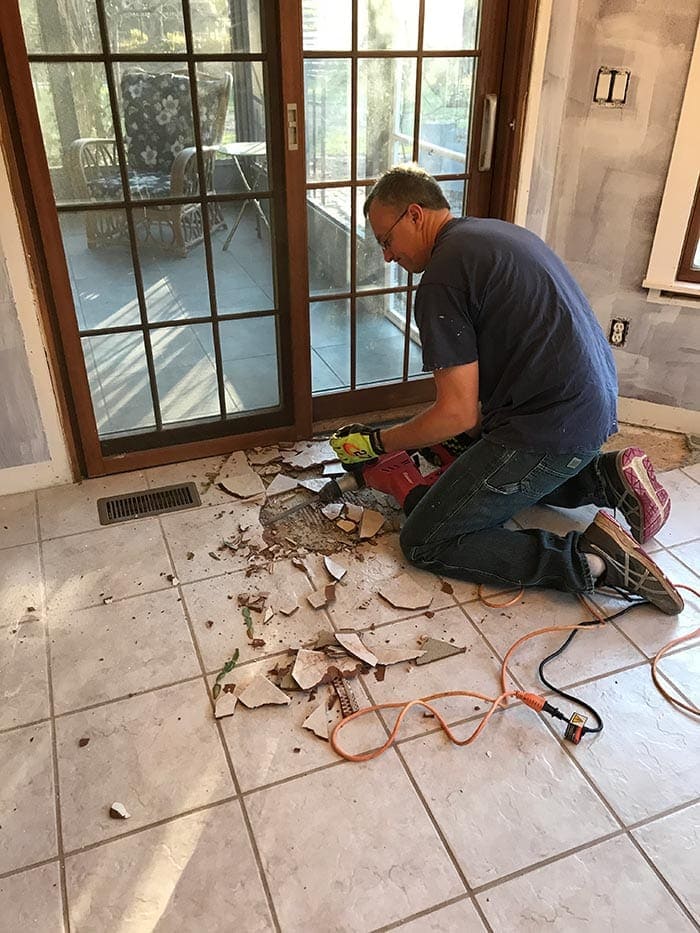
To start with Craig pried up a few of the tiles to see what we were dealing with…
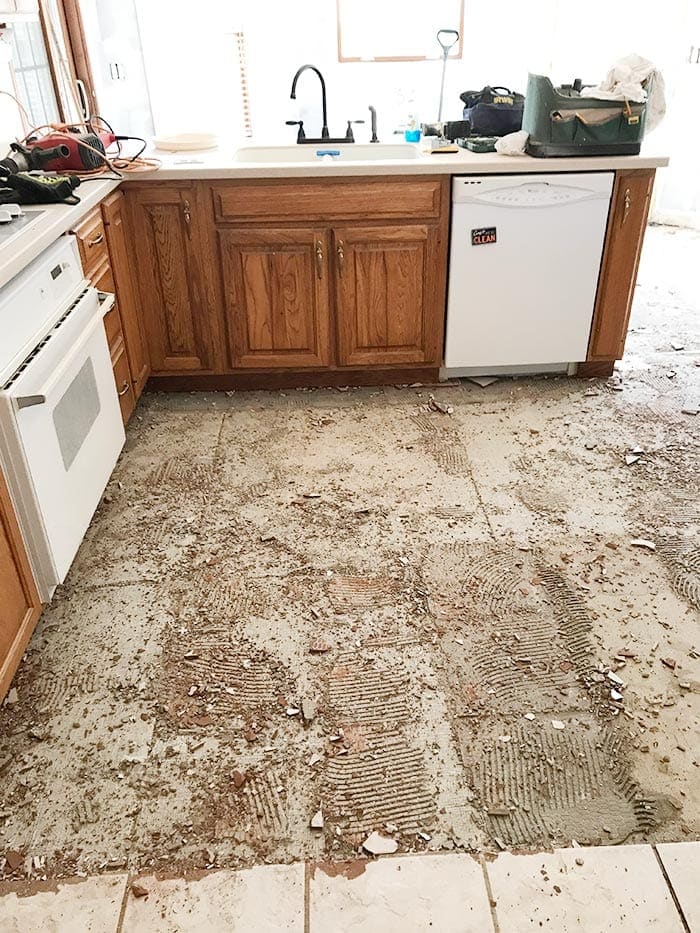
 and what we were dealing with was not a great scenario. The builder had put mortar directly onto the subfloor, then laid cement board + more mortar + tile. Not an easy demo project!
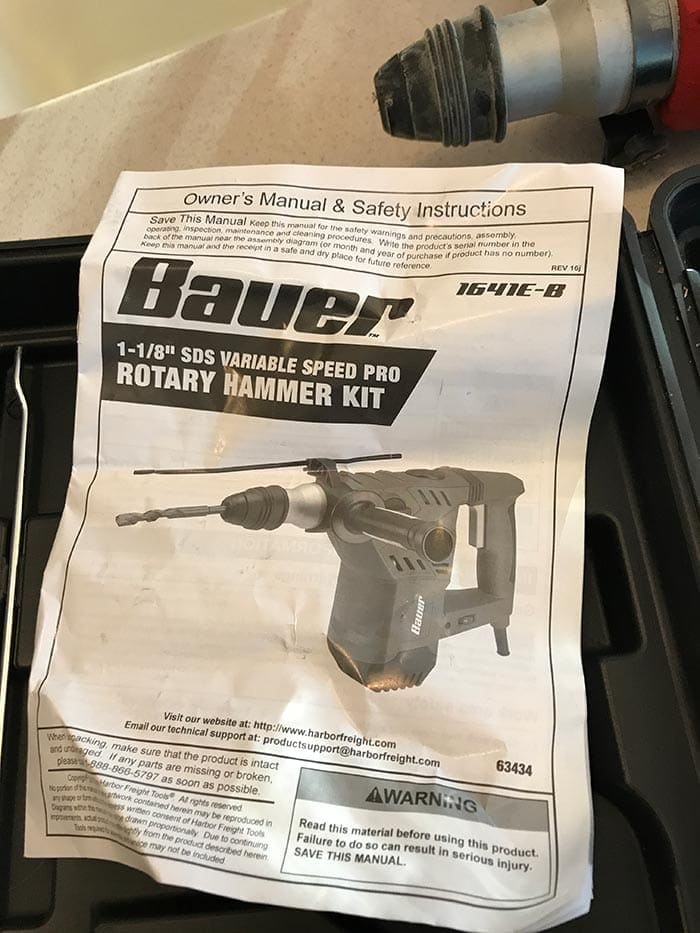

So Craig purchased a rotary hammer drill kit to chisel under the tile (similar drill and chisel bit on Amazon). Which worked pretty well, but still left a ton of jaggedy uneven mortar bits on the subfloor. So the first step required chiseling away all the old tile. So he worked in sections, doing the dining area floor first… and hauling away about 10 garbage cans full of broken tiles and junk.
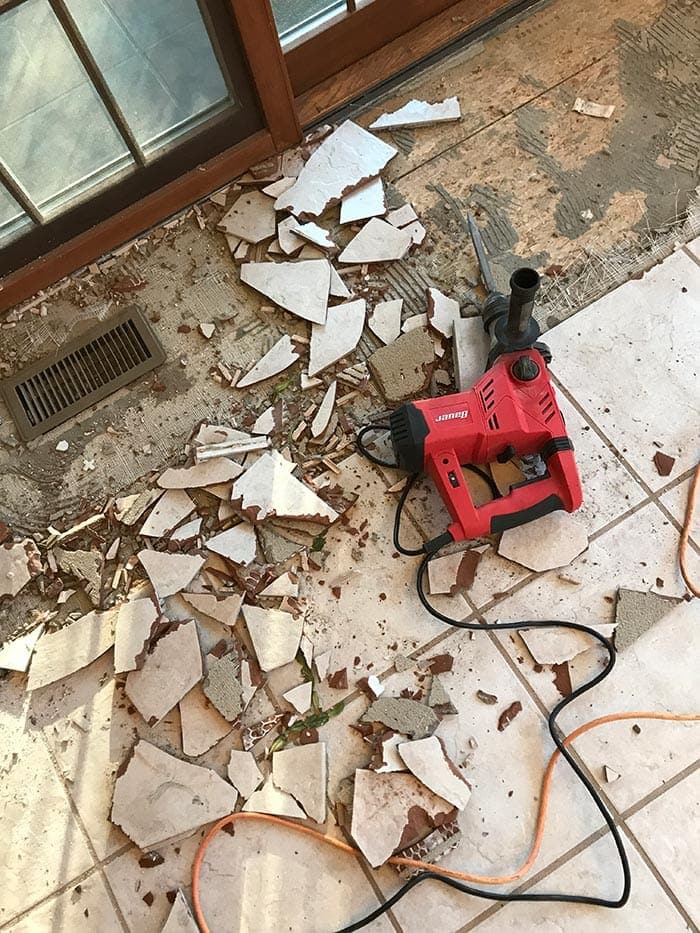
But once the old tile was up, he was still left with the stubborn cement board. This is the point where we briefly considered just taking the whole dang subfloor out and cutting out all the old cement board as well… But that would have required even more structural work to replace the old subfloor and tie into floor joists, etc. So he kept chiseling away with the hammer drill and removed most of the cement board as well, which left him with the old mortar still stuck on the subfloor.
Once he got the tile removed in the dining area, we took all the pots & pans (and my daughter’s slime supplies!) out of the island to remove it. We were trying to keep our stove, sink & dishwasher usable for as long as possible. If this was a flip house, and we weren’t still living here – we would just take everything out in one full swoop!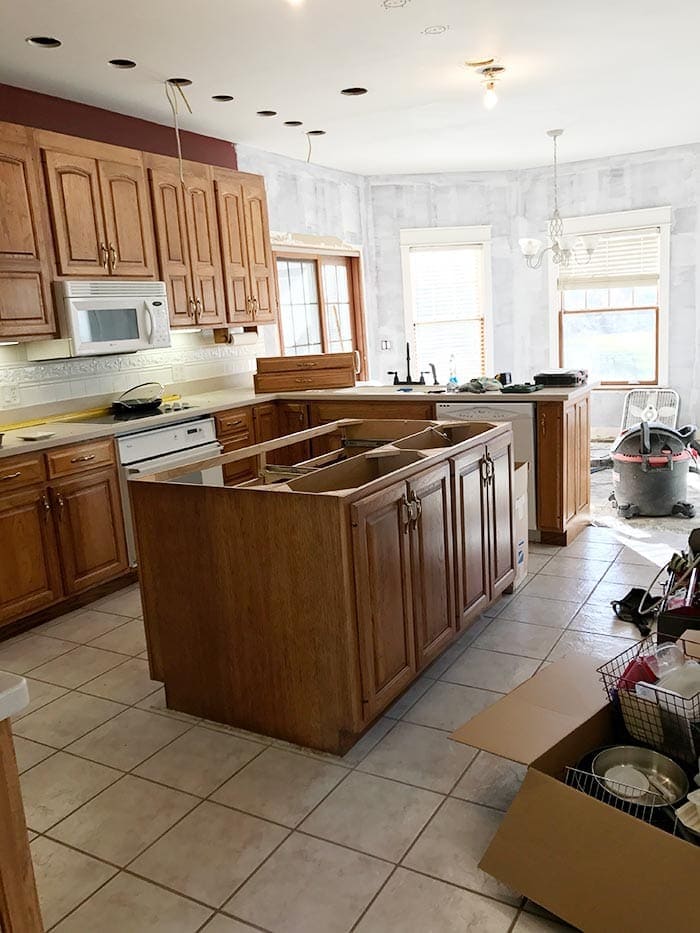

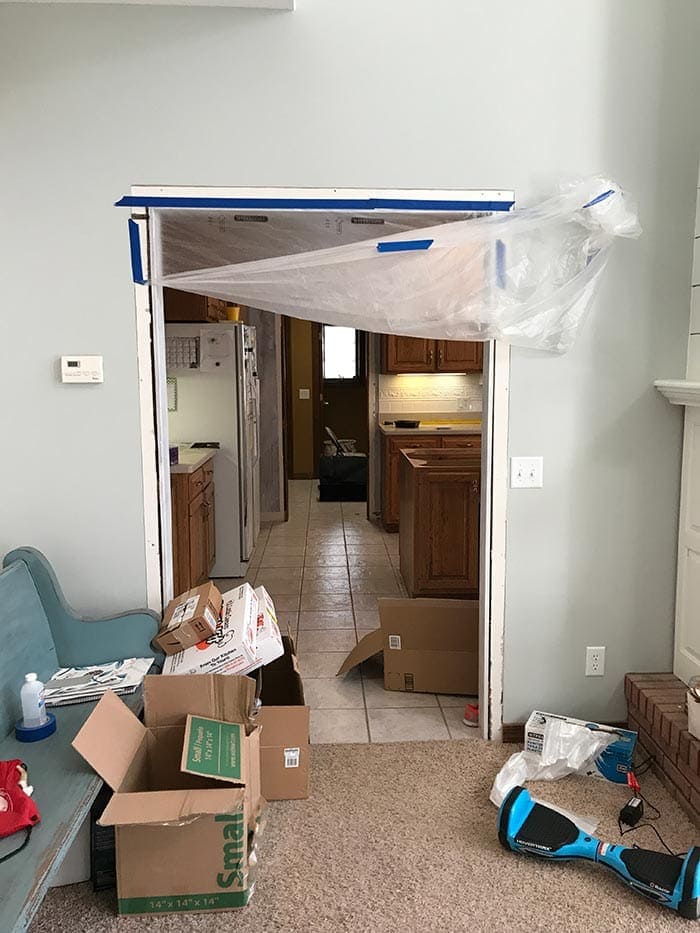
We taped off the doorways into the kitchen to try and contain all the dust and keep it from spreading throughout the house.
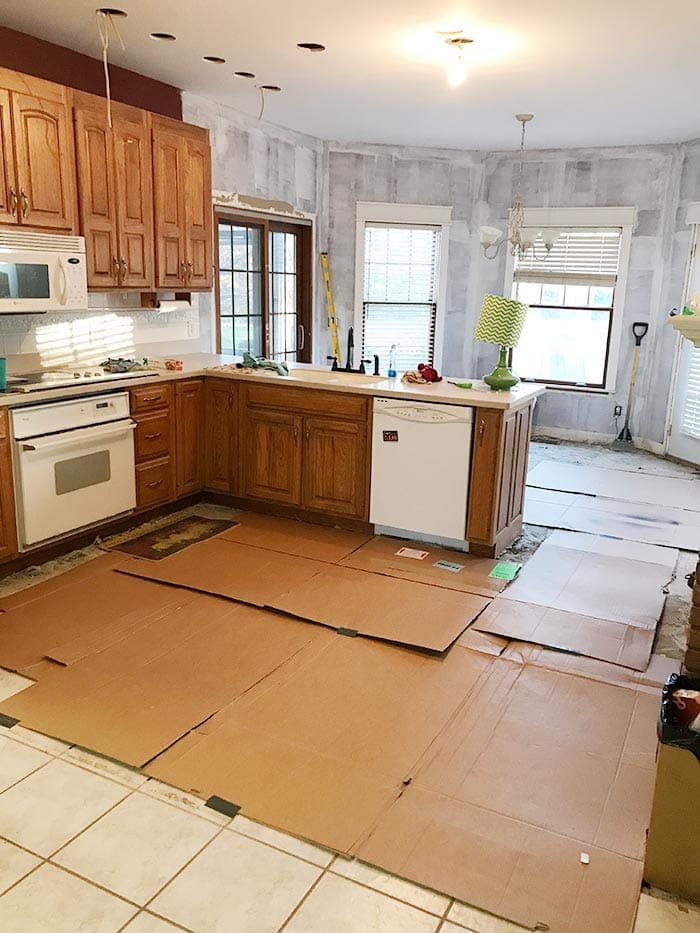
We covered up the jaggedy floor with cardboard so we could walk in here to fix food 🙂
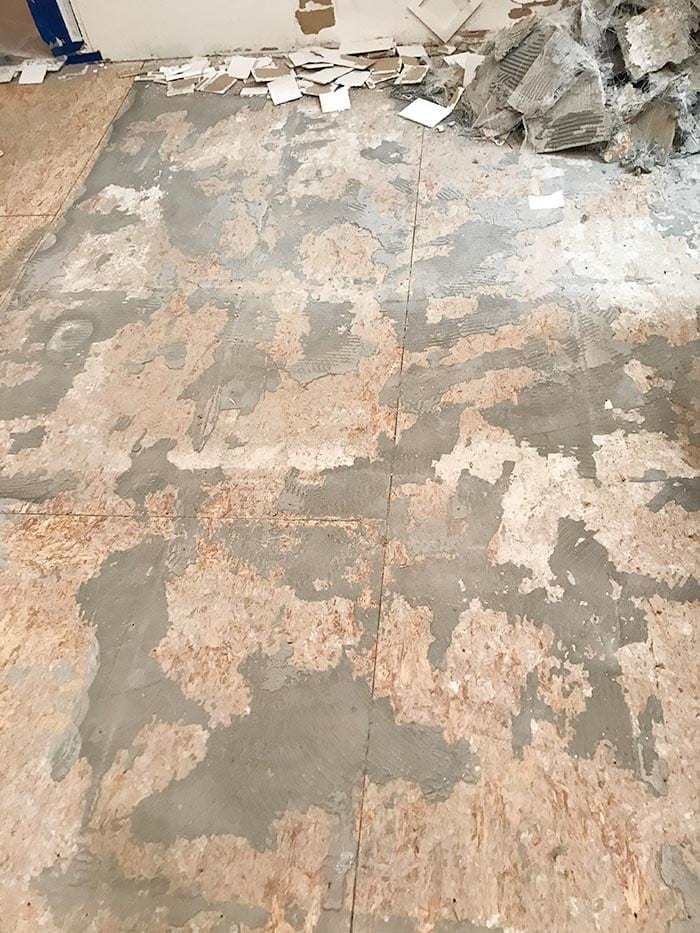
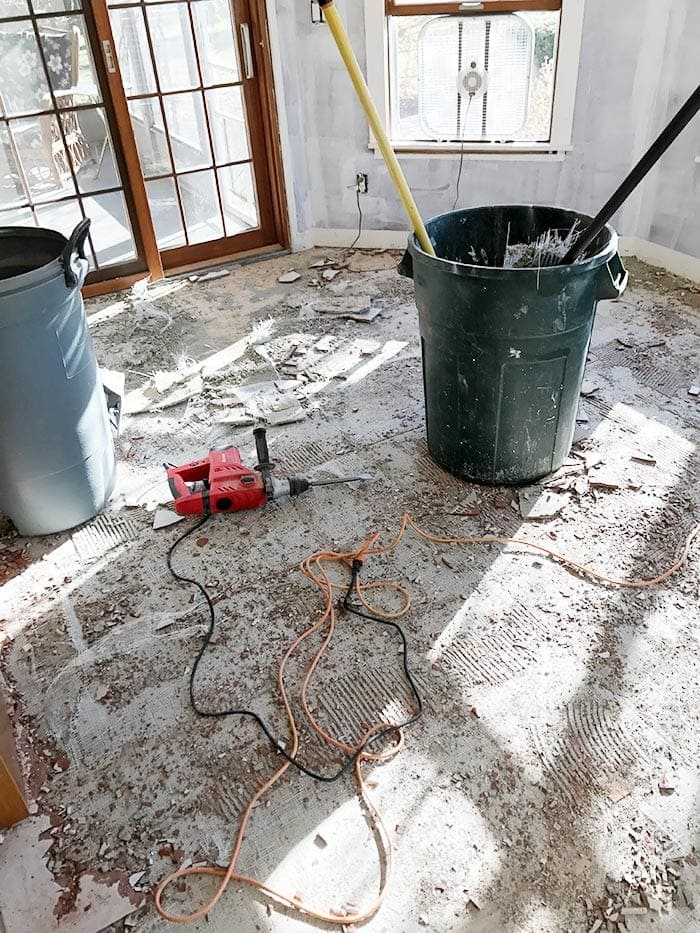
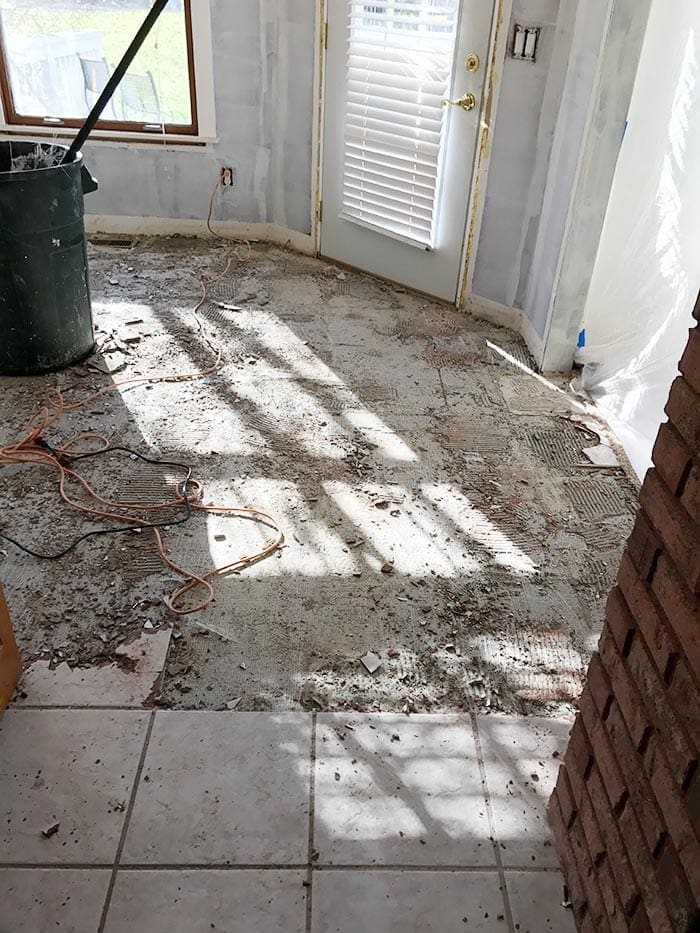
So once Craig finally got all the tile and cement board off, we were still left with all this uneven mortar still stuck to the subfloors. Obviously, you can’t lay hardwood floor over an uneven surface. But thankfully, my genious hubby had a secret weapon…
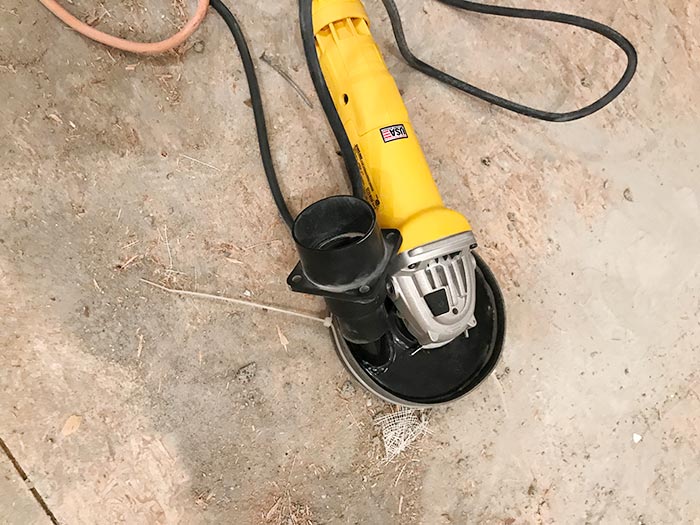
His angle grinder! He purchased this diamond cup wheel from Amazon along with a dust shroud and adapter (from Menards) to connect to his shop vac to contain the dust as much as humanly possible. This won’t contain all the dust, so be sure to tape off your other rooms – but it was MUCH better than trying to sand away all this mortar without the shroud! Unfortunately, I didn’t get an action shot of him doing this since I was sequestered away in my office (far away from the noise & dust) – but here’s a good before and after shot.

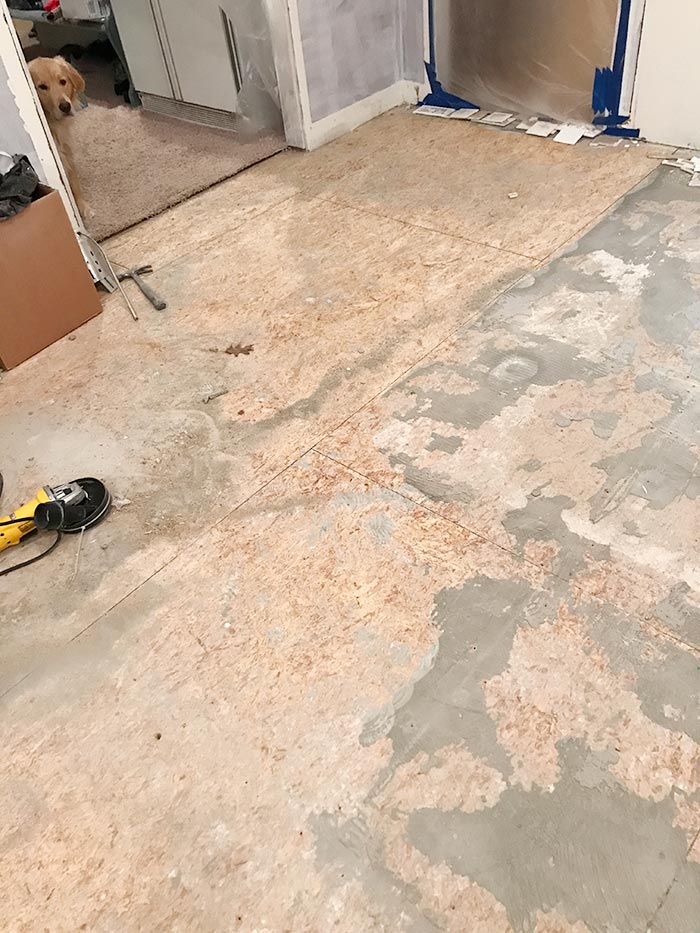
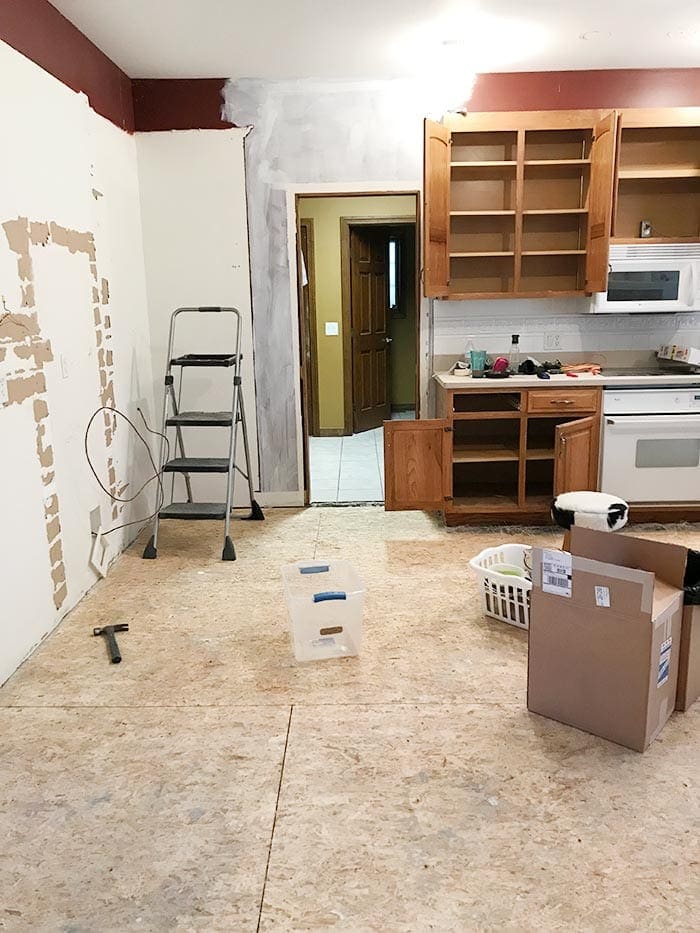
And FINALLY, after about 5 days of grueling work…we have a smooth plywood subfloor and can continue taking out the old cabinets! I’m so thankful to be married to such a hardworking guy. He truly is my Mr. Fix It and has saved us thousands and thousands of dollars by doing so much of the labor himself. Thanks for reading about how to remove tile floors and if you have any questions just leave us a comment. I’ll be posting my full kitchen design plans soon… and I just ordered this awesome sink yesterday. Can’t wait to get this reno finished!


Wow Christy and Craig!! That is some serious work. So what flooring are you putting down – or is that information to be revealed at a later date?? 🙂
Thanks Leslie! Yes, it is a ton of work (and probably not the best timing to demo your kitchen right before Christmas, but better late than never I guess – ha!) We chose engineered hardwood floors in a lightish white oak. I will write up all the info of our floor saga in another post since it was kinda a nightmare (including get the wrong color delivered twice!)
Removing mortar is seriously horrible! We are removing our tile and the person who did this also laid it like they did yours. BUT we have this other type of flooring over the subfloor, I’m hoping if we use the angle grinder it will help remove the mortar!! Because scraping it is not working at all! I wish I could post pictures so I could get your input!
Can’t wait to see future post!
oh I feel for you Kaycee 🙁 It is horrid! Thankfully, my hubby was able to do it all himself (I can’t even imagine how much a flooring company would charge to do this!) The angle grinder seriously helped a ton, so definitely give it a try! We still have tile in our laundry and master bathroom to remove and we are NOT looking forward to it…ugh.
God Bless You! This article saved my life as I was trying to demo a DIY river rock grouted bathroom floor the previous owners had installed! Especially the chisel/hammer tool. Honestly I was at with a end tryin to remove with conventional chisel and hammer.
I’m so glad it was helpful, Sharon! Removing tile can be total pain, but using the right tools can definitely make things a bit easier. Thanks for reading! 🙂
Wow, how amazing! We are tearing up the tile in our basementand want to do stained concrete. Where is the concrete located under a tile floor? I thought it would be under the tile but in my research I’m realizing that may not be the case .. please help!
Hi Alexis! If you’re tearing up a basement floor, there are really 2 possible scenarios (I think) #1 – They laid the tile over a “cement board” type of material, which if that’s the case you will need to also remove the cement board to uncover the actual concrete/basement floor beneath. Tile is usually installed over this cement board to give it a more solid base foundation and to keep the tiles from moving/buckling. Scenario #2 – they put the tile right on top of the basement concrete floor (since it’s a basement, you wouldn’t have a subfloor so you wouldn’t necessarily need the cement board for stability) It’s really hard to guess what they did without tearing up at least one tile. Every remodel we do, we run into different construction methods/problems and you really just have to jump in and see what you have! I hope this helps a little bit – good luck with your project!! 🙂
Removing tile floors can be a labor-intensive task, but with the right approach, it can be done successfully. Start by removing the grout using a grout saw or rotary tool. Then, use a chisel and hammer to carefully pry up the tiles. Finally, remove any adhesive or mortar residue using a scraper or solvent.