DIY Blanket Scarf
Hey, y’all! I have a VERY quick and easy tutorial for you today that I think you’re going to love! Today I am going to show you how to make a beautiful diy blanket scarf that is so popular these days. This DIY (no-sew!) scarf can be made in just a couple of hours and for a fraction of the cost of buying a blanket scarf! Yay!
![]() Have you caught on to the blanket scarf trend yet? I personally am a huge fan of scarves in general but I adore the blanket scarf because it just looks so cozy! Not only is it a great way to keep warm during the colder months, it’s also an essential fall and winter accessory. Unfortunately, a lot of the blanket scarves on the market are a bit pricey and I am a cheapskate, so I rarely spend a lot of money on clothing and accessories for myself. That’s why I was thrilled when I was able to make my own blanket scarf for just $8! Here’s how I made my own diy blanket scarf (and how you can too!):
Have you caught on to the blanket scarf trend yet? I personally am a huge fan of scarves in general but I adore the blanket scarf because it just looks so cozy! Not only is it a great way to keep warm during the colder months, it’s also an essential fall and winter accessory. Unfortunately, a lot of the blanket scarves on the market are a bit pricey and I am a cheapskate, so I rarely spend a lot of money on clothing and accessories for myself. That’s why I was thrilled when I was able to make my own blanket scarf for just $8! Here’s how I made my own diy blanket scarf (and how you can too!):
DIY Blanket Scarf
Supplies:
(affiliate links)
- 1 1/2 yards of cotton plaid flannel (I found mine at Joanne’s Fabrics and used a 50% coupon, so my fabric was only $8! Did you know you can order from Joanne’s online and pick up at your local store? love that!) here’s some great online options: black & white flannel, navy & green plaid, red & white plaid.
- fabric scissors
- seam ripper
Instructions

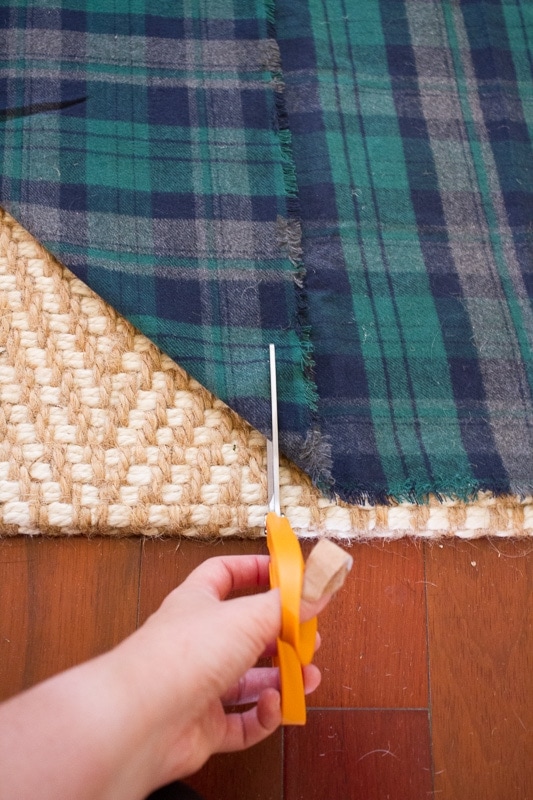
- Start by cutting off the rough edges on one cut edge and one selvage edge of the fabric. I just chose a line in the plaid that was close to each edge and cut alongside it using my sharp fabric scissors.

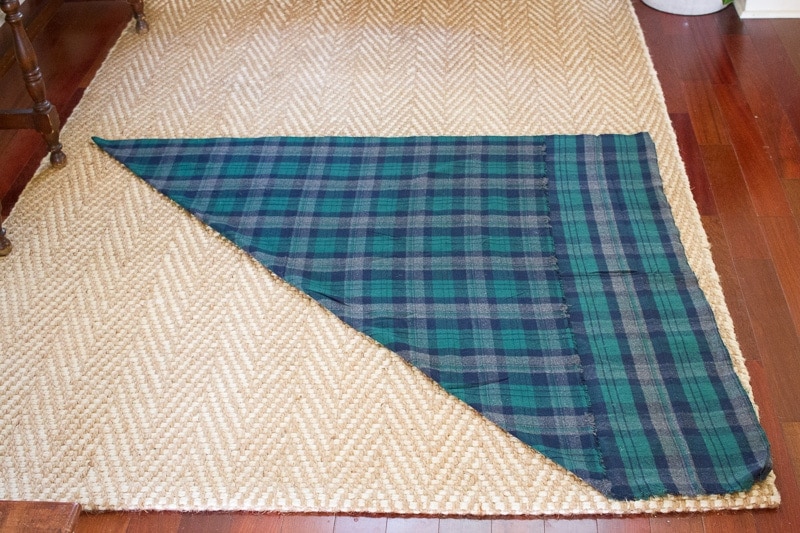
- Next, lay your fabric on a hard surface, like the floor. Take the corner of the fabric where your uncut selvage edge meets your newly evened cut edge and cross it over to the opposite side of the fabric, making a triangle. You will have about 10 inches of fabric left to one side of your triangle.
- Choose a line in your plaid close to the selvage edge that is overlapped onto those extra 10 inches of fabric. Using your scissors, carefully cut along that line so that you are cutting not only the selvage but the extra 10 inches of fabric off. When this is all cut off, you’ll have a perfect triangle that, when you unfold it, becomes a perfect square of fabric.
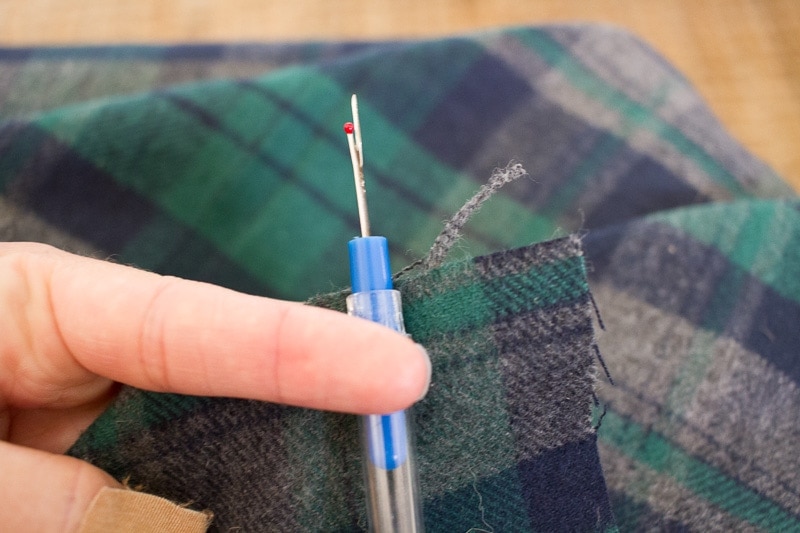
- Now that your edges are squared and ready, it’s time to begin fraying. This is the part where I sat on my couch and watched my favorite show while I worked. Start on one side of your fabric and start carefully pulling threads out of the fabric. If the thread gets caught (and it will as you go), use the seam ripper to gently pull it out. Try not to break the threads. You probably will have to only do one or two threads at a time so they don’t get tangled.
- Continue pulling threads until you reach your desired length of frayed edge (I chose to stop after about 1/4 inch).
- Repeat pulling the threads on each side of your fabric until you reach the desired amount of fraying.
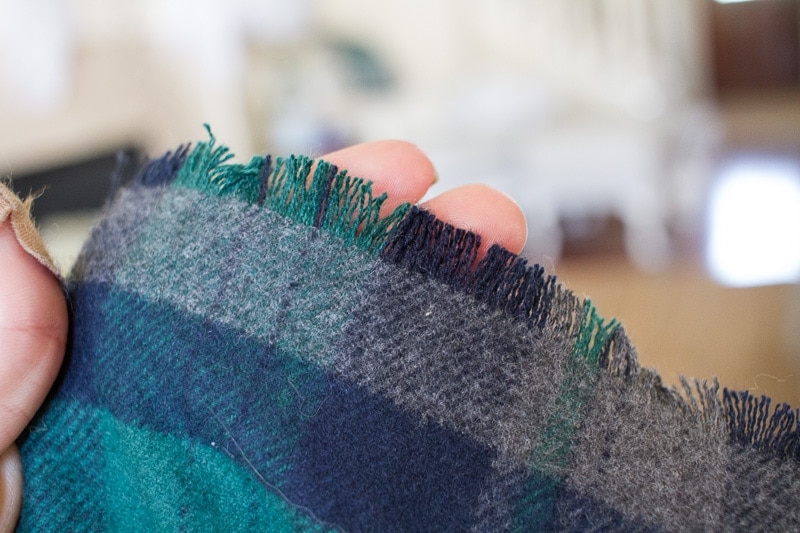
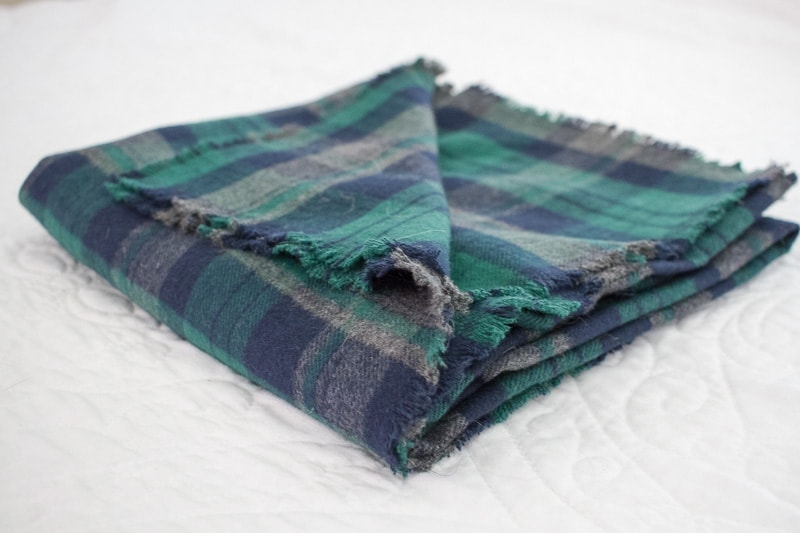
 That’s it! How easy was that? Now you have a beautiful, soft, cozy blanket scarf that you can wear all season long!
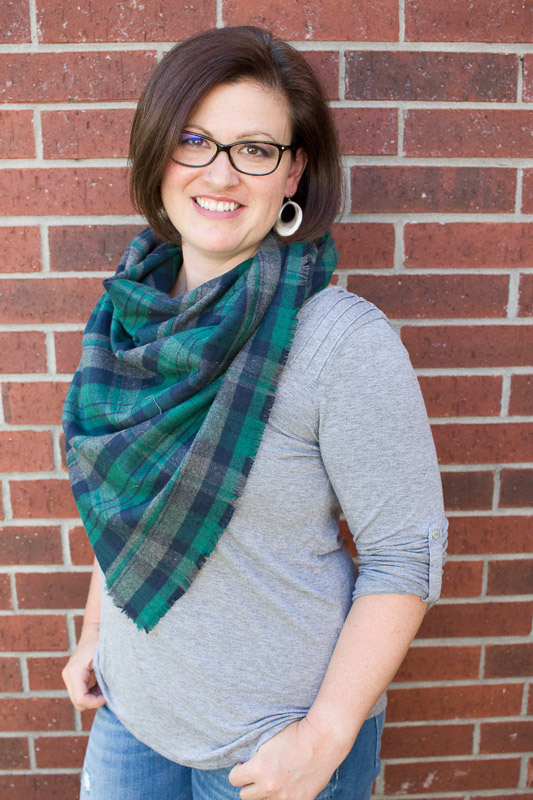
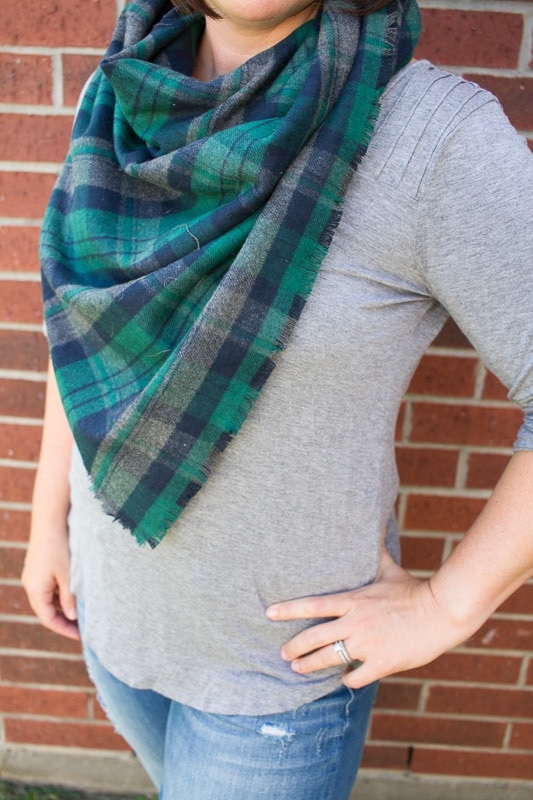
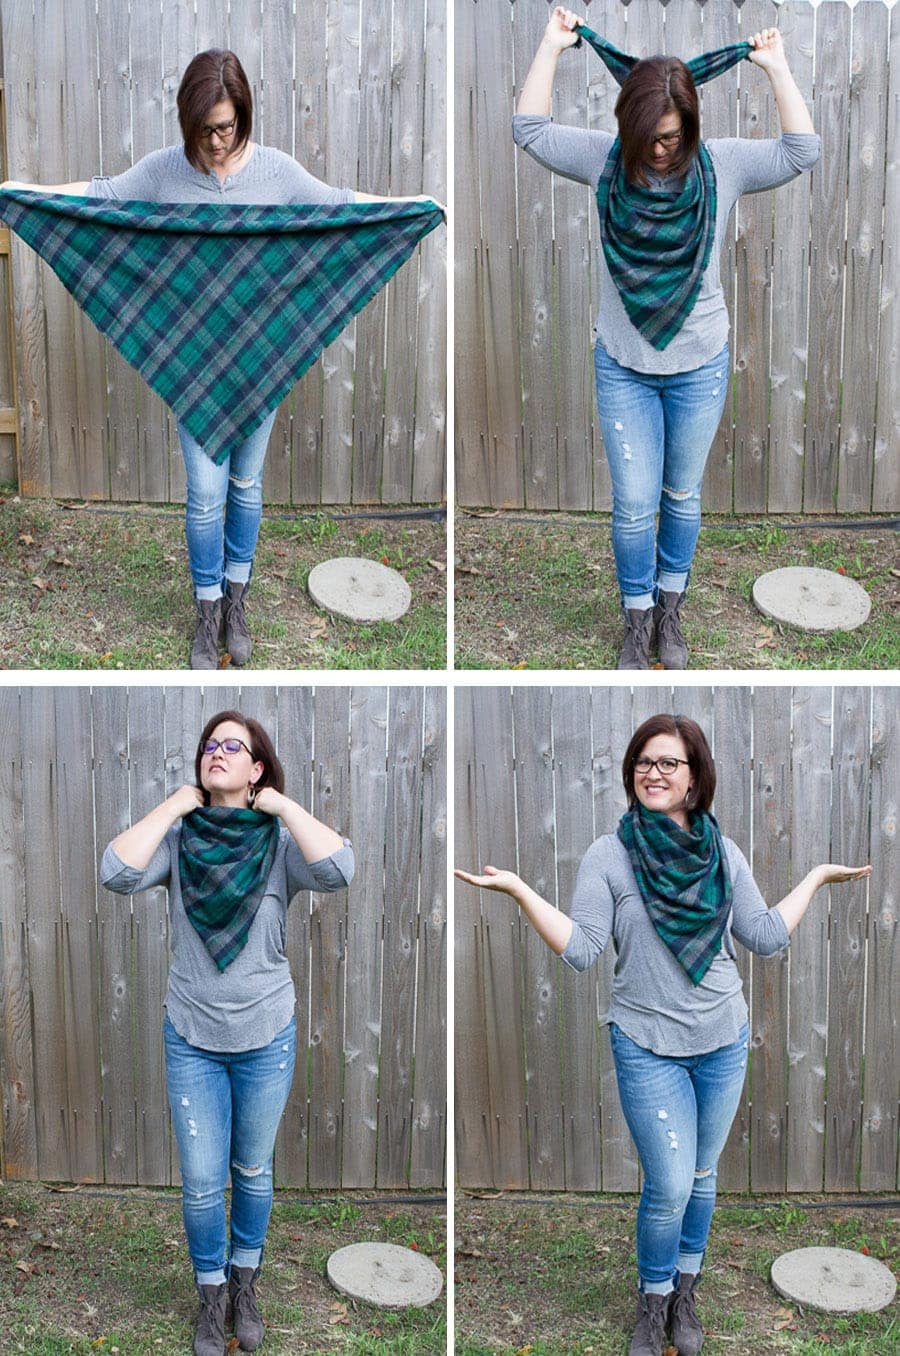 And for those of you who wonder how to wear the blanket scarf, I have found the easiest way is the fold it into a triangle and, holding the triangle upside down in front of you, wrap the two ends around the back of your neck and then tuck them under the scarf right at your chest. Fluff the front as necessary. That’s all there is to it!
 How do you like the diy blanket scarf? Try making one of your own this fall and brag to all your friends how you made it yourself. I promise, they’ll be super impressed!